Assembling the rafter system of a gable roof. Calculation of the rafter system of a gable roof. About rafter legs
The gable rafter system is chosen by many owners of residential buildings. This is due to its high practicality and ease of creation. If you carefully study the structure of the rafter system gable roof, then the process of its formation can be done with your own hands. The resulting structure is highly reliable and durable, and also guarantees excellent protection of the structure from cold and precipitation.
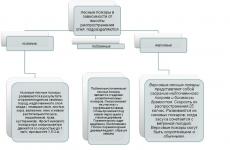
Main elements of the system
The design of the gable roof truss system is considered simple. It consists of a variety of elements made from wooden elements of different lengths, configurations and cross-sections. The main nodes include:
- Mauerlat. It is represented by a beam with a square-shaped cross-section. Coniferous wood is usually used to create it. Its dimensions vary from 10 to 15 cm. It is laid along all load-bearing walls of the building. It is fixed to them using anchors or special rods. If you make and attach it correctly, it will evenly distribute the loads from the rafter legs along all the walls of the structure.
- Rafter legs. They are created from timber with cross-sectional dimensions of 15x10 or 15x5 cm. When they are properly connected, a roof contour is formed in the shape of a triangle. It must be durable and reliable to withstand heavy loads from rain and wind. The rafter legs should be fastened at a distance of about 1 m from each other.
- Sill. It is created from a square wooden beam, the cross-section of which is equal to . It is laid horizontally on a load-bearing wall located inside the building. Due to it, the load coming from the roof racks is evenly distributed.
- Puff. This element applies if you select hanging structure. It is installed on top of the resulting triangle of rafter legs, which ensures its stability.
- Racks. To create them, a square beam is used. They are located in a vertical position. They bear the load from the ridge, after which it is transferred to the load-bearing wall located inside the building.

- Struts. The installation of these elements is necessary to obtain a special transmission element located between the rafter legs and various load-bearing parts. Due to their reliable connection with a tightening, the creation of a strong structure is guaranteed.
- Lathing. Assembled from bars or boards. Installed perpendicular to the rafter legs. It ensures the transfer of gravity from the roof of the roof to the legs of the rafters. It is advisable to use edged boards. If you plan to create a covering on the roof from soft roofing materials, for example, bitumen shingles, then the sheathing must certainly be continuous.
- Horse. It is represented by the topmost element of the entire roof. Due to it, its two slopes are connected. Its assembly is carried out by connecting the legs of the rafters at the top of the roof. It must be located in a horizontal position.
- Eaves. It protrudes from each wall of the building by about 40 cm. Its installation is due to the need to protect the walls from water flows resulting from precipitation.
- Fillies. Provides the ability to create a roof overhang. They are used exclusively in situations where short rafter legs are used, so they are lengthened by fillets.

- rafters are created exclusively from high-quality wood, which is free of any rotten areas, damage, knots or other defects;
- to form the sheathing, edged boards are purchased;
- all wood must be well treated with antiseptics and fire retardants.
- Load calculation. Any system is affected by two types of load. Permanent forces will regularly impact the structure, and this includes the weight from the roof covering, sheathing, thermal insulation material, waterproofing, additions and finishing materials used for the attic. Typically this load is 40 kg/m. sq. Variable loads can have different strengths, as they include wind, snow exposure and precipitation intensity. To calculate the load, the wind load of a specific region is multiplied by a special correction factor.
- Determination of the angle of inclination. A roof with two slopes can have a different angle of inclination, and it is determined by the roofing material used. If mounted soft roof, then a slope is selected for it ranging from 5 to 20 degrees, or metal tiles vary from 20 to 45 degrees.
- Calculation of snow load. In winter, a large amount of snow can accumulate on the roof. To avoid any problems with the structure, the frame must withstand these loads. To calculate, you need to multiply the weight of the snow by a correction factor.
- Definition . The gap between these elements is usually selected in the range from 60 to 100 cm, and the final choice depends on the roof and the weight of the roof.
- Definition . To do this, it is recommended to use the standard Pythagorean theorem.
- Determination of the rafter section. This parameter is affected by several important factors: roof loads, type of materials used, length of rafter legs, as well as the pitch between them.
- . Suitable for small buildings. Their installation involves fixing the legs to the load-bearing wall of the structure, as well as to the ridge girder. A peculiarity of the use of these elements is that the rafter legs are subject to a bursting force, and to reduce this influence, puffs are used. They can be made of wood or metal.
- Layered. Suitable for roofs of any shape and size. The layered structure is used in conjunction with racks and beds. The bench is laid parallel to the fixed Mauerlat, so a certain part of the load is transferred to it. This allows you to tilt the legs of the rafters towards each other, which are additionally supported by the stand.
- Combined. They are used when using unusual configurations of gable roofs.
- To the walls of the building. Its installation is carried out along their entire length. If the house is made of logs, then the mauerlat acts as its upper crown. If you select for a building cellular concrete or brick, it is mounted on top of the load-bearing wall along its entire length. It is necessary to splice the mauerlat, for which the beams are sawn at right angles and connected with bolts. It can be mounted offset to the side of the wall or in its center. Laying is done on a layer of waterproofing, for which roofing felt is usually used.

- Creation of roof trusses. To do this, it is allowed to install beams on the roof or form a structure on the ground, after which it is raised to the roof. The second option is often chosen, since it is difficult to carry out work on the roof of a house. But to lift the constructed structure you will have to use special equipment. Before connecting the legs of the rafters, their correct size and location are checked.

- . The formed pairs are lifted to the roof, after which they are laid on the Mauerlat. To do the job correctly, special cuts are made at the bottom of the legs. The process begins with the ends of the roof, located opposite to each other. To obtain an ideal result, temporary fasteners are used when installing elements. A rope is stretched between the fixed pairs, making installation of subsequent elements simplified. All rafter legs are mounted, and the correct pitch between them is checked. Next, a special ridge support is installed. All additional elements, used in the rafter system, are fixed by cutting and staples. It is allowed to lengthen the rafter legs if necessary.

- Installation of the ridge. It is created using a competent connection on top of all rafter legs. To form it, they use different methods, and it is allowed to use a support beam for this or you can work without it. If timber is used, it is permissible to place a ridge on it or use the cutting method.

- The rafter system is considered completed, but in order for it to be strong and reliable, all elements must be thoroughly secured, so all temporary fasteners are eliminated, in place of which high-quality products are used to fix all parts of the system.
- Installation of sheathing. This design designed for easy movement on the roof, and also serves as a basis for laying the roof. Its type and parameters depend on the chosen roof. A continuous sheathing is created if a soft roof is chosen. has a distance between boards within 35 cm. For slate, this parameter is 44 cm.

Important! The pitch between the legs of the rafters is selected in accordance with the weight of the roof, since the more weighty it is, the smaller this gap should be.
Thus, the design of the gable roof rafter system is considered quite simple, so making this structure with your own hands is not difficult.
Types of structures
The rules and features of the installation of this design depend on the chosen variety.
Types of gable roof rafter system:

All options have their own characteristics, so their characteristics are preliminarily assessed. If you plan to install the rafter system of a gable roof with your own hands, then a simple symmetrical design is chosen.
Important! Basis for obtaining perfect result are competent calculations, and if they are incorrect, then the roof will not be reliable and durable, and it will also be dangerous to live in such a house.
How to choose a material to create a system?
When choosing a material, the following rules are taken into account:
Important! The presence of knots is allowed, but their length cannot be more than 1/3 of the thickness of the timber used. 
Calculation rules
To make the rafter system of a gable roof reliable and of high quality, a lot of attention is first paid to competent calculations. They should affect all elements of the future design:
Important! When calculating loads, the possibility of a storm or tornado is additionally taken into account, since if the house is located in a region where such loads can occur, then a safety margin is made for the roof, read more:. 
Types of rafters
Before the actual work on creating a gable roof with your own hands, you should make a special plan, which will contain a drawing and layout of the entire structure. In this case, it is taken into account which rafters will be used, since the following types can be used:
After determining the main design parameters, the calculation begins required quantity material. Next, you can begin to directly create the rafter system. 
Installation of the structure
A do-it-yourself rafter system for a gable roof is created only after preliminary drawings and plans have been generated. The scheme of future contraction must be clear and correctly calculated. To do this, it is recommended to use special computer programs.
Important! If you have funds, you can contact specialized construction companies for correct calculations.
Installation of a gable roof truss system is divided into successive stages:


The rafter system of a gable roof is considered one of the simplest in purely structural terms. It consists of only a few elements, the number of which decreases or increases due to the size of the roof itself. But despite its apparent simplicity, the process of erecting a gable roof requires knowledge of some nuances that affect the quality of the final result.

Rafter system for a gable roof
What is a gable roof?
From the name it becomes clear that the roof structure consists of two slopes having a rectangular shape in the plane. More often, the slopes have the same dimensions, but there are so-called asymmetrical designs, in which the slopes differ in size from each other.
In this case, the slopes are installed to each other at a certain angle, which is called inclination. The line of contact is the ridge beam, which is part of the rafter system. Simply called the ridge, it is the highest point of the roof.
The side planes formed by the slopes are called pediments. They have a triangular shape. After constructing the roof, the sidewalls are lined with sheet or panel materials: plywood, OSB, even boards, etc.
What is a gable roof rafter system?
The basis of the structures of the slopes are the rafter legs, also known as rafters. They are made either from lumber (timbers, boards) or from a steel profile (angle, channel). Wood is used in private house construction. It’s easier to work with, plus the lumber is cheaper.
The construction of a gable roof rafter system is not only about rafters. Besides them there are several more mandatory elements. The photo below shows all the elements of a gable roof. Let's label them.

Each of the roof elements has its own purpose
Elements of a gable roof rafter system
Mauerlat. Essentially, this is a beam on which the rafters rest. Its purpose is to evenly distribute the loads from the rafter legs onto the walls of the house. If the Mauerlat is not used, then the rafters will put pressure on the walls pointwise, that is, large stresses will arise at the installation sites, which will lead to cracking of the walls.
Rafters installed at an angle.
Horse, aka ridge beam or purlin. Its task is to form the joining point of the rafter legs. Ridge beam is an optional element of a gable roof. There are designs in which it is not installed. But more on that below.
Puffs. They are not always used, but only on hanging rafters or if the rafter system is installed on a wide house.
Floor beams, which form the ceiling in the room and the floor in the attic.
One of the floor beams, called let's lie down. It additionally serves as a base for support posts that support the rafters. Not always used.
Support posts, they are also the headstocks that support the rafter legs. They are installed only if the span of the house is at least 6 m.
Struts, they are also diagonal supports. They are used only if the support posts cannot ensure the overall reliability of the rafter system.
There is one more element that is clearly visible in the photo below. These are support posts for the ridge girder. They are installed if the structure of the rafter system is heavy. That is, the entire structure is assembled under heavy roofing material, for example, ceramic tiles.

Layered rafters with support posts under the ridge girder
You might be interested! Warm roof– this is an important detail when building an energy-efficient house. From the article at the following link you can find out.
Types of rafters
The roof rafter system (gable) can be assembled from layered or hanging rafters.
Layered
They got their name because their lower ends rest on the walls of the house, their upper ends on ridge run. In this case, the rafter elements are subjected to loads that bend them. The design is reliable, durable, with high load-bearing capacity.
The photo above just shows a layered rafter system. It is clearly visible that the legs rest on the ridge at the top. In this case, there are two types of fastening of the rafters themselves in the upper part:
fastening is done to the ridge:
fastening is done to each other with emphasis on the ridge (photo above).
Hanging
It is necessary to immediately indicate that this type rafter system can be used if the distance between the walls of the house does not exceed 12 m. Because the rafters rest with their lower ends on the walls, and their upper ends only with each other (there is no ridge girder in the design). Hence the low load-bearing capacity with a large spread.
Hanging roof rafters have one purely design drawback - a large support load on the walls of the house. To reduce it, strings are installed between the legs to form a rigid triangle. Often the functions of tie bars are performed by load-bearing floor beams.
If it is necessary to strengthen the hanging rafters, racks and struts are installed under them.

Hanging rafters of a gable roof
Installation of a gable roof rafter system
Two types of rafter systems determine two types of assembly technology. Let's look at each one separately.
Installation of layered rafters
There is a certain sequence for assembling layered rafters.
Two outer support posts are installed under the ridge beam. They will not only support the timber, but will also be the elements that form the gables of the building. They are attached at the bottom to the Mauerlat. In this case, they are strictly aligned vertically, and the upper ends are in the same horizontal plane. To do this, stretch a strong thread between the posts and check it with a level to ensure it is horizontal. If there are deviations, then one of the supports (low) is raised using wooden supports.
Intermediate support posts are mounted along a horizontally stretched thread in increments of 2-2.5 m. To prevent the beams of the posts from moving, they are supported with temporary fasteners: supports or tie-downs.
A ridge beam is placed on the racks, which is also attached to them.
Produced in pairs installation of gable roof rafters. Installation can begin from any side. The fastening is carried out immediately to the Mauerlat and to the ridge. The main thing is to maintain the distance between the legs, which is determined depending on the gravity and load-bearing capacity roofing material. Usually this parameter is indicated in the house design.
If necessary, intermediate support posts and struts are installed.

Installing rafters on a ridge along a tensioned thread
Installation of hanging rafters
The technology for installing hanging rafters is different. To do this, the entire structure, assembled from two rafters and a tie, is assembled on the ground. That is, roof trusses are prepared in the required quantity, which are then lifted onto the roof. Sometimes craftsmen assemble roof trusses. They assembled one, installed it, and assembled the next one.
It should be noted that such farms have a significant mass. Lifting them manually is difficult and dangerous, so they use the services of a crane. And this increases the cost of construction.

Gathered on the ground roof trusses hanging type
The most difficult thing is to display the farms. All of them are installed at the installation site with a planned step, where they are temporarily secured with jibs and supports. Then a thread is stretched between the outer trusses. It must be positioned so that, firstly, it is stretched strictly along the horizon, and secondly, along a structure that is higher than the rest.
All that remains is to raise the rafter structures that are below the tension level. And the last thing is the installation of the sheathing, which will secure all the trusses into one rafter system. Please note that in the lower part the rafters will be fixed to the Mauerlat.
This might interest you! When the installation of the rafter system is completed, it’s time to roofing works. From the article at the following link you can find out.
Calculation of rafters
length of rafter legs;
step of their installation;
cross-section of the lumber used.
With length, everything is simple; for this you will have to use the Pythagorean theorem, which is based on the formula: c 2 =a 2 +b 2, where c is the hypotenuse of the triangle (this is the rafters), a and b are the legs. The latter are the height of the roof and half the width of the house. All parameters can be easily measured.

The length of the rafter is l 2 +H 2
The installation pitch is more difficult, because much will depend on the weight of the roofing material and the loads from natural precipitation. The greater both loads, the smaller the installation step. But, as practice shows, this parameter varies from 60 cm to 2 m. The latter indicator is used if corrugated sheeting with large corrugation parameters, for example, H75, is used as a roofing material.
As for the cross-section of the rafter legs, here, as in the case of the installation step, the loads are taken into account, as well as the length of the legs and the step of their installation. Here the relationship is as follows: the greater the load, pitch and length, the larger the cross-section.
Video description
In the video, the installation process of the rafter system:
And one moment. Rafters for a gable roof are laid at a certain angle (indicated by the letter “a” in the photo). The slope is selected based on the choice of roofing material. That is, some coatings cannot be laid on roofs if the angle of inclination is less than the required one. Here are some ratios:
the minimum angle of inclination of the rafter system for slate is 22°;
for corrugated sheets – 12°;
for metal tiles – 14°;
soft tiles– 15°.

Ratio of roof slope to type of roofing material
On our website you can find contacts construction companies who offer turnkey roof design and repair services. You can communicate directly with representatives by visiting the “Low-Rise Country” exhibition of houses.
Generalization on the topic
Gable roofs are traditional designs. But from the article it becomes clear that there are two rafter systems that form the basis for the construction of roofs. The one that fits the size of the house is selected. The loads pressing on them are also taken into account as a selection criterion. Therefore, it is important to correctly correlate everything, taking into account the nuances of construction processes.
The roof becomes an important structure of the house. She completes the construction of the building frame, after which only finishing remains. The most common implementation scheme is with two slopes. You can make a gable roof with your own hands without much difficulty, you just need to understand the technology.
Roof structure
Before you begin installing a gable roof, you need to understand what it is. The design differs from all others in its pediments. The following varieties can be given depending on the method of assembling the rafter system:
- single-pitched - the pediments have the shape of a trapezoid or a right triangle;
- gable is characterized by triangular gables;
- hipped (hip) has no vertical edges.


Main elements of the system gable roof are:
- rafters;
- Mauerlat;
- crossbar;
- struts;
- racks;
- contractions (ties);
- sheathing;
- thrust bars and pads.

Rafters are the main load-bearing structures. When constructing with your own hands, it is important to choose the correct cross-section, otherwise an emergency situation may arise.
Preparing to start work
Before making a gable roof, you will need to select materials. Installation begins with the selection of wood. To build with your own hands reliable design resistant to external factors, you will need to follow the following recommendations:
 For construction it is better to choose coniferous species of the first or second grade
 - it will be correct to choose materials coniferous species wood (spruce, pine, larch are more resistant to rotting);
- the structure is assembled from wood of the first or second grade, the use of the third for critical elements is unacceptable;
- it is better to choose lumber that is produced in the northern regions than more difficult conditions the growth of a tree, the denser its structure;
- they try to choose the material that was cut down at the end of the cold period of the year (February-March).
- load from snow cover (snow region);
- weight of the roof covering;
- rafter pitch;
- span (distance between reference points);
- insulation thickness.

A thermal insulation layer is required when designing a residential space – an attic – in the under-roof space of a house. Most often, installation is done by hand mineral wool material for increase thermal insulation characteristics. At the same time, it is important to ensure ventilation gap between the heat insulator and the roof covering. The height of the rafter leg should not be less than the thickness of the insulation. To increase the clearance, a system element such as a counter-lattice is introduced - a block that is nailed parallel to the rafter and increases its height.
The most convenient pitch of rafters for a private house is one that provides a clear distance between them of 0.58 m.
This allows you to correctly install mineral wool slabs without trimming or additional elements. For such a step, the following recommendations for the cross-section depending on the span can be given:
- span 3 m – rafter size 40x150 mm;
- 4 m – 50x150 mm;
- 5 m – 50x175 mm;
- 6 m – 50x200 mm.
It is important to know the following: on bearing capacity and bending resistance is affected more by height than by width. If necessary, increase the load-bearing capacity more effectively by increasing the height.
Another element whose cross-section will need to be selected is the sheathing. The most optimal value would be a thickness of 32 mm. With increased load, the value is increased to 40 mm.
The remaining components of the house's rafter system are assigned structurally, based on what lumber is available. But it is still worth taking into account the strength requirements.
Immediately after purchasing the material, before assembling the system begins, you will need to process all the elements yourself special compounds.
A gable roof, like any other roof of a house, needs the following types of protection:
- antiseptic, produced in mandatory, allows you to prevent the processes of rotting and the occurrence of mold and mildew (even if the installation is not planned some time after purchasing the wood, the treatment is carried out immediately);
- fire retardant, optional, but very important, it increases the wood’s ability to resist fire, thereby increasing the safety of the structure.
Installation of a house rafter system
To build the roof of a house with your own hands, you need to complete all the work in a certain order. Installing the elements is not difficult, but you need to control the quality of the components and connections. The most important areas are:
- fastening the Mauerlat to the wall;
- fastening the rafters to the mauerlat;
- fastening the rafters together.

To properly build a roof with your own hands, work should be done in the following order:
- Mauerlat installation;
- installation of rafters at the designed angle;
- fastening the legs at the top;
- bracing load-bearing structures using racks, struts and grips;
- installation of counter-lattice, sheathing, waterproofing;
- insulation roofing system with your own hands;
- installation of the bottom sheathing, installation of the roofing.
Attaching the Mauerlat to the wall
When installing it yourself, it is important to understand where to lay the Mauerlat. A beam with a section of 150x150 mm or 200x200 mm is installed on the inner edge of the external walls. It is important to ensure sufficient thermal insulation of such an area. Outer part fences in this area can be made of the same material as the walls.
In this case, the laying is performed at an angle equal to the slope of the slopes. The second option is to fill the space with expanded clay concrete. These methods are relevant for stone houses (brick, foam concrete, expanded clay concrete, etc.). If you plan to build a frame or wooden house the top frame or crown of the wall will act as a mauerlat.


You can do the job in several ways:
- Fastening with staples. To do this, wooden blocks are installed in the penultimate row of masonry, to which the lower part of the brackets will be attached, and the upper part is inserted into the mauerlat. Wooden plugs must be impregnated with an antiseptic.
- Fastening to wire. To carry out this option, you will need to lay a wire 3-4 mm thick in the masonry of the walls or a monolithic belt; its length should be such as to wrap the beam and twist the wire rod.
- Fastening with bolts or studs. The options are similar, but the first provides greater reliability. Fasteners are placed in a monolithic belt. After this, the timber is laid on studs or bolts. To make holes for them in in the right places, lightly tap on the Mauerlat. The resulting depressions will be places for drilling holes. After their preparation, the beam is finally installed in the design position and tightened with nuts.
When building a house, it is also important to know how to build up the Mauerlat. Standard sizes lumber - 6 m, and the walls can be longer. To connect two elements along the length, you will need to perform a direct lock. To do this, the lower part of one element is cut out, and the upper part of the other. Fastening is done with bolts. It is not recommended to cut at an angle in this case. Corner joints are also made using a straight cut.
The choice of method for attaching the Mauerlat largely depends on the material of the walls, or more precisely on its strength. For lightweight concrete, pouring a monolithic belt around the perimeter will be a mandatory step.
It is important to provide waterproofing between the wood and the stone material. For this purpose, roofing material, linochrome or waterproofing material are most often used.
There are two most common options for doing the work yourself when building a house:
- with a gash;
- without drinking.
In both cases, the rafters are additionally secured with metal corners on both sides. When using a system with a saw, you will need to process the timber at an angle corresponding to the slope of the roof of the house. When installing without cutting, you need to prepare a support beam with your own hands, which will not allow the system element to move across the Mauerlat. As an additional fixation, nails are hammered in and a twist of wire is inserted from the leg to the wall (this fastening can be done through one leg).
 2 types of fastening rafters to the Mauerlat
 In order to obtain detailed and visual information on how to install a gable rafter at home with your own hands, it is recommended that you familiarize yourself with the series “knots wooden roofs residential rural buildings". This album contains a large number of options for securing all elements, which will help you complete the installation without errors.
Among the wide variety of types of roofs, the most popular has been for several centuries. Relative simplicity of design, excellent stability, adaptability to different climatic conditions - powerful arguments tested over many years construction practice. The information below will be useful both to those who will be constructing a gable roof truss system with their own hands and to those who decide to use the services of professionals to understand and control the work.
Types of gable roofs
A gable roof, also called a gable roof, consists of two inclined rectangular planes - roof slopes, which are installed at a certain angle to the outer walls of the building. Due to the angle of inclination of the slopes, the natural flow of natural precipitation (rain, melt water) is ensured.
Roofs with uneven slope angles (i.e. the ridge is not located through the center of the building) and different lengths eaves overhangs are used when the customer wishes to express the architectural feature of his home. Such a roof, in terms of design, looks quite original, but has the disadvantage of irrational use attic space.

A broken gable roof is applicable in cases where there is a need to use the attic space as an attic. In such a roof, the increased volume of the attic makes it easy to create an attic, which is protected from moisture and insulated.

A gable symmetrical roof has an isosceles triangle at its base. Its orthodox form and unpretentiousness during construction made it a favorite not only professional builders, but also novice specialists.

Semi-hip roofing is one of the varieties of gable roofs, which has an original appearance and creates high-quality protection for the gable. This type roofing is especially in demand in areas with high wind loads.
The first thing you should pay attention to when organizing the construction of a gable roof is its angle of inclination. To a lesser extent, it depends on architectural features, but to a greater extent on the climatic characteristics of the region in which the roof will be erected and on the type of roof being installed. Roofs with a steep angle are installed in regions that are subject to frequent precipitation. Areas with strong wind zones require the installation of gentle slopes to relieve the structure from wind loads.

The angle of inclination of the slopes can range from 5 to 90°. A common option is a roof with an angle of 35-45°. This option is the most economical in terms of consumption building materials and uniform load distribution along the entire perimeter of the building. At this angle of inclination, the attic space is made of a cold type and in the future it is not suitable for living in it.
If it is necessary to arrange an attic space for living room, then it is necessary to use a broken gable roof. In this case, the upper part of the roof will become more flat, and the lower part will have a steep slope. Attic space will increase and it will be possible to use it for attic housing. For this type of slope, the design of the rafter system will become more complicated compared to using a simple option.
Types of rafter systems for gable roofs
The technology of constructing a rafter system for a gable roof has differences in the use of support bases for the rafters. There are hanging and layered rafter systems. Accordingly, rafter systems use hanging or layered rafters in their design. There is a third option - hybrid, when both types are installed in the rafter system.
Hanging rafters are used in structures with a distance between supports of no more than 6-6.5 meters.
Layered rafters are installed in buildings with a load-bearing middle wall or with columnar supports inside.
The load-bearing structural elements in a gable roof are the rafter system and the Mauerlat.

The rafter system includes such elements as: rafter legs, vertical posts, inclined struts, crossbars, spacers, ridge purlin. All these elements, combined into a single structure, form the rafter system as such.
The material from which rafters and other structural elements are made can be made of wood, iron and reinforced concrete.
Before using the material, you must ensure that any knots you encounter do not exceed a third of the thickness of the material in length!
Mauerlat is a beam with a cross-section from 100×100 mm to 200×200 mm, which is placed under the rafter leg or laid along the entire perimeter of the structure. Its purpose is to distribute a uniform load on the external walls.

The Mauerlat is installed on the upper wall edge. Installation occurs either along the axis of the wall, or with an offset to the outer or inner edge of the wall (but not more than 50 mm from the outer edge). Before installing the Mauerlat, place it under waterproofing material, which, most often, is roofing felt. The connection of the Mauerlat links must be strong and occurs using straight locks.

Construction of the rafter system
Main types of rafter structures:
- the rafter legs of the opposite slopes are connected by horizontal ties (for a house width of up to 6 m);
- the ridge girder rests on vertical posts, additionally inclined struts are used (for houses up to 10 m wide with an empty attic, the design is designed for high loads);
- horizontal purlins resting on vertical posts act as additional support points; the rafters are tied with ties (for a house width of up to 15 m).
Rafter structures are made of timber with a cross-section of at least 50×150 mm. The crossbar is located at the level of the future attic ceiling.
If, when building a house with your own hands, it is possible to lift ready-made trusses to the installation site, it is recommended to make rafters on the ground, using the first A-shaped frame element as a template.
It is recommended to make rafter legs from solid timber, but if necessary, you can join the timber on both sides using nails or self-tapping screws. The pitch of the rafters can be calculated based on the dimensions of the sheet insulation. First of all, the outer A-shaped elements are installed, onto which a ridge purlin made of 100×150 timber or 50×150 boards is attached. The ridge girder gives rigidity to the entire frame.
In order not to weaken the Mauerlat, fastening slots are made in the rafters, resulting in the rafter horizontal plane The slot lies on the surface of the Mauerlat, and the protrusion rests on the vertical plane of the Mauerlat. Fixation is carried out with three nails, two of which are driven on both sides of the rafters, and the third through its upper plane.

There are various ways to attach the rafters at the top of a gable roof, which you can do yourself:
- The edges of each pair of rafters are cut in such a way that when the cut planes are mated, the rafter legs form a given angle of inclination of the roof. Then the rafters are fastened together wooden planks using nails, or metal plates with bolted connection. A nail with a length of at least 150 mm should be driven into the upper plane of the rafters;
- Rafters different stingrays are placed on the installed ridge girder, and they must be cut so that the horizontal section is equal in width to half the thickness of the ridge beam. The rafters are fixed to each other metal strips which should be placed above the span (suspended connection, requires rigid fastening of the legs to the Mauerlat);
- An overlap connection is the simplest option; the rafters are tilted at the same angle and connected with studs or bolts using wide washers.

At the next stage, such types of elements as purlins, racks, struts, etc. are mounted, if they are included in the selected frame scheme. During installation, it is important to control the verticality and horizontality of structures. Mistakes made during the construction of a roof are almost impossible to correct.
Design Features
A traditional, widespread option is symmetrical gable roofs with straight slopes - gable roofs. Optimal angle The slope of the slopes is about 45° - this design can withstand serious snow and wind loads.
If you want to equip an attic, other types of roofs are used. In particular, it is a gable roof with broken slopes - in the upper part the slopes are gentle, and in the lower part they have a sharp slope. For roofs of this type, it is necessary to erect a rafter system of a more complex design.

In some cases, asymmetrical gable roof, the ridge of which is located offset from the center. The design of such a roof is developed taking into account the characteristics of the building. A gable roof can also be half-hipped. In this case, the design differs from a gable roof in the presence of sloping roofing elements above the gables.
Installation of the rafter system
Before you begin installing the gable roof rafter system, you must fasten the Mauerlats to the longitudinal walls using anchor bolts. Next you need to decide optimal cross-section rafter legs, which depends on their length and the distance between them. To do this you need to produce. If it is required that the lumber have a different width and length of rafter legs, then the required size is achieved by splicing them (extension) using fasteners.
To use insulation, you should select a rational distance between the rafters so that as little thermal insulation material has to be cut as possible.
If you plan to build a roof structure with your own hands, you need to make a calculation based on the width of the roof and its height to the ridge. Standard scheme involves the creation truss structure, which is based on an isosceles triangle. Simple geometric constructions and calculations make it possible to calculate the length of the rafter legs: to square root From the sum of the squares of the height to the ridge and half the width of the roof, an allowance for the eaves overhang should be added.

The required number of rafters depends on the length of the roof and the selected roofing material. Typically, the pitch of rafter structures is 1.2 - 1.5 m. It is not recommended to exceed these values.
Based on the length of the rafter leg and the length of the roof ridge (including allowances for overhangs), the area of the roofing surface is calculated - to do this, the indicated values should be multiplied.
When calculating lumber, it is necessary to take into account the presence of such elements of the rafter structure as:
- Mauerlat;
- skate;
- rafter legs;
- racks;
- crossbars;
- struts.
Depending on the type of roofing material, the type of sheathing is determined. It can be sparse (with different pitches) or continuous; soft coverings are covered with continuous covering with sheet material. If a half-hip roof is being installed, it is also necessary to calculate the amount of roofing and construction material for the installation of hips - triangular cut tops above the end walls of the house.
All wooden elements require treatment with special compounds that prevent rotting, pest damage, and fire.
Installation of rafters occurs in the following order:


Mounting the Mauerlat
A do-it-yourself rafter frame can be attached to the floor beams, but in this case all the loads on the building structures will be concentrated on the places where the floor beams are attached. This option is suitable for small, lightweight buildings.
To ensure uniform distribution of the load on the upper surface of the walls parallel to the ridge of the future roof, a Mauerlat is mounted, which will serve as the basis of the frame. To make the Mauerlat it is used wooden beam section 150×150, 100×150 or 100×100. It is attached to the wall in one of the following ways::


Calculation of loads and angle of inclination
Accurate calculation of the rafter system of a gable roof is the key to the future strength and reliability of the house. When designing complex roofing structure its calculation should only be carried out by a professional. You can independently calculate the roof using small area using simple formulas.
At the very beginning, the angle of inclination of the roof slopes is determined. An inclination angle of 5-15° is suitable for a small number of roof coverings. In view of this, the roofing material is first selected, and only then the rafter system is calculated. For tilt angles above 45°, any roof covering, but along with this, material costs also increase.
It is also necessary to do this, depending on the climatic region. Snow load limits are in the range of 80-320 kg/m2. On a roof with a slope of no more than 25°, the coefficient of transition from snow cover to the roof is equal to 1. For roofs with a slope of 25-60°, the coefficient is taken to be 0.7.
For example, with a snow load on the ground of 120 kg/m2, the load on a roof with an inclination angle of 25-60° will be 120×0.7=84 kg/m2.

Wind load is calculated using the coefficient of change in wind pressure and aerodynamic influence.
Weight is calculated roofing pie- constant load, which includes the weight of the sheathing, counter-lattice, insulation, roofing material, and also, in the case of an attic, the weight interior decoration ceilings. The average constant load ranges from 40-50 kg/m2.
A correctly calculated rafter system, made by yourself, can withstand high loads, including:
- wind pressure;
- snow pressure;
- person's weight.
The roof should not exert strong or uneven pressure on building structures that transfer the load to the foundation of the house.
Its resistance to loads depends on the angle of inclination of the roof. How larger angle, the stronger the frame should be. This parameter also affects the choice of roofing material.
Conclusion
Installing a gable roof involves creating a high-quality roofing pie. The gable structure is insulated with sheet or roll materials. It is important to perform high-quality vapor barrier. For finishing apply different kinds roofing materials, from standard slate to high-tech tiles.
Erection of the roof is one of the most critical stages of building a house. To the most simple designs These include gable roofs with straight slopes. If you decide that you will build a gable roof with your own hands, then you need to carefully read step by step instructions and video. The functional parameters of the roof also depend on proper insulation, characteristics and quality of installation of the finishing coating.
Preparatory stage
To determine the configuration and size of the roof, it is necessary to take into account the snow and wind load in the existing climatic conditions - the smaller the angle of inclination, the better design resists loads. But the small angle of inclination (40 degrees or less) does not allow full use of the attic space.
The shape and structure of the roof are developed in accordance with the design plan of the house: the key support points of the roof truss system must coincide with the lines and locations of the load-bearing structures of the underlying floor. Thus, it is necessary to take into account the width of the house and the presence of a longitudinal load-bearing wall in the center. If the attic is not planned to be used as additional usable space for permanent or seasonal residence, you can make a reliable roof with layered rafters. In this case, the rafters are attached to the ridge girder, which is supported by racks resting on the internal load-bearing wall.

Hanging rafters - the most practical and economical option for light buildings. In this case, the rafter legs are connected in pairs with crossbars - horizontal jumpers, which provide the necessary structural rigidity. System with hanging rafters rests on the side walls of the structure.
If the width of the house exceeds 6 meters, in addition to the crossbars, which act as the basis for the ceiling, purlins and racks are installed. The purlin is a horizontal beam that acts as an additional support for the rafters that form the roof slope. Installation of the purlin requires the use of racks. The racks, in turn, rest on the beds - a special beam laid along the slope. The beds and racks serve as the frame of the walls attic room. This layered design allows you to create an attic or spacious attic for household needs with your own hands.

If construction is required simple and reliable roof, optimally suited gable design with an inclination angle of 45-50°. This rafter system is suitable for installation on residential buildings and buildings for various purposes. When calculating materials, it is necessary to take into account that the rafter system must be light enough to avoid excessive load on the foundation, but at the same time strong. The cross-section of lumber should be selected based on the dimensions of the rafter structure.
Mauerlat installation
Let's look at a step-by-step method of building a roof with layered rafters and an attic space with your own hands. At the first stage, installation is carried out on the longitudinal walls of the house top harness- Mauerlat. The strapping takes on the pressure of the entire roofing system and transmits it evenly building structures– walls and foundation.
The Mauerlat is made of timber (section from 50×150 to 150×150 mm), treated with special protective equipment to protect against rotting and fire.
Mauerlat can be made in various ways:
- V brickwork rolled wire is embedded, through which the beam is fixed to the wall (the wire is threaded through specially made holes and twisted tightly);
- Long metal pins with a diameter of 12 mm or more are embedded in the masonry;
- At the top of the wall there is a monolithic concrete beam with embedded steel studs.

The studs should be spaced at intervals of no more than 120 mm. The height of the protruding end of the fastener should be 20-30 mm higher total thickness waterproofing and timber, in which holes should be made in advance. The beam is put on the studs and tightened tightly with nuts and wide washers.
Construction of the rafter system
The rafter system, which you can make with your own hands, consists of a number of elements combined into a single whole. The A-shaped rafter truss is a rigid structure that works “for expansion”. If the roof construction is carried out on timber house, opposite walls should be strengthened with ties made of 100x150 mm timber at the level of the ceiling beams. This is done to prevent the walls from moving apart under load.

Beams are laid on the ceiling - additional elements made of timber 150×150 mm or more, which serve as support for the racks and redistribute the point load on the surface of the ceiling. Laying the beds with your own hands should be done along the lines of the walls of the future attic space. If the attic is not planned to be used, the bed can be laid directly under the ridge to install support posts. If necessary, you can splice the timber, but only in places where the joint will lie on the beam. Tenon connection secured with a bracket or metal plate.
Repeating parts of the rafter system should be made completely identical to each other in order to build an isosceles gable roof, the weight of which will be distributed evenly even under atmospheric loads. For this purpose, templates of identical parts are made with your own hands.

50x150 mm boards are laid out on the floor of the house, a triangle of the required height is made from two rafter legs and a stand board (its length corresponds to the height of the future roof), connected with a nail. Two or three people lift the structure - the stand is installed on the central axis of the ceiling, the rafters are installed on the mauerlat.
In the process of preparing the template, you can lengthen the elements by varying the height of the roof and choosing the most suitable option.
Having decided on the dimensions, it is necessary to make curly cuts on the rafters at the points of their contact with the strapping. The rafter leg should rest firmly on the mauerlat. Exists whole line fastening methods, you should choose the most convenient and reliable, it is advisable to use metal linings. The intricacies of the technology can be found in the video. The resulting rafter structure subsequently acts as a template, and the support board helps control the height of the installed trusses.
Gable
The pediment is a continuation of the wall, limited by the roof slopes. If a gable roof is provided, the gables of the house have the shape of a triangle. When installing a truss structure, the outer trusses are installed first, which later serve as the frame for the gables. It is necessary to strictly check the verticality of the structures and ensure that they have the same height. A ridge girder is attached to the upper part of the gables, to which the remaining rafter structures are subsequently mounted.

Usually the gables are sewn up after the roofing work is completed, but this can be done at an earlier stage. Installation of boards 50×100 or 50×150 mm is carried out in a vertical or horizontal direction. The pediment, which you can build with your own hands, is often equipped with windows.
It is also necessary to provide for insulation of the gables.
Roof insulation and roof installation
A sheathing is placed on the rafter system, the pitch of which is calculated based on the characteristics of the roofing material - its size and rigidity, and installation method. If intended to be used flexible materials(bitumen shingles, PVC film, rolled bitumen roofs), it is necessary to make a continuous, even flooring.

Roof insulation must be treated with the utmost care, as otherwise heat losses will be very significant. Typically, a gable roof is immediately made taking into account the use of certain materials for insulation - when building a rafter system with your own hands, the pitch of the rafters is calculated relative to the width of the sheet insulation. This allows you to build a roof with minimal economic costs, since the material for insulation does not have to be cut. In addition, this approach speeds up and simplifies the installation of insulation and vapor barrier systems.
In this high-quality video you can see in detail how to make a gable roof yourself and make sure that there is nothing complicated about it.