Natural materials in technology lessons. Procurement of natural materials
Nature is an inexhaustible source of creativity and inspiration. From time immemorial, people have drawn themes for works of art from it. For the people, their environment was not something frozen, motionless. Fields and trees, sun and clouds, grass and mountains were spiritualized images in fairy tales, epics, proverbs and sayings. In wildflowers, people saw the charm of youth, birds were a symbol of freedom and independence, the wind was the personification of strength and power, the Dnieper-Slavutich - wisdom and greatness, the people affectionately call the great Russian river Volga mother.
Love for nature comes with a mother's lullaby and a grandmother's leisurely, educational tale. Nature teaches and educates. Remember “Three hundred pages of the Book of Nature” by V. A. Sukhomlinsky, his famous “school of blue sky".
Man is the owner of his land, namely the owner, and not a waster. Caring for nature must be cultivated from childhood, just like respect for elders and a culture of behavior in society.
Since ancient times, folk craftsmen have used natural materials to make various crafts, many of which have outgrown their narrow utilitarian purpose and turned into genuine works of art. Fedoskino and Palekh boxes have gained worldwide fame, Dymkovo and Filimonov clay toys are widely known, and the famous matryoshka doll is very popular in our country and abroad.
All natural materials can be divided into two large groups: plant and mineral. Plants include leaves of trees and shrubs, bark, flowers, straws, cones, acorns, chestnuts, etc., minerals include sand, shells, pebbles, etc. The list of one and the other group is quite extensive, therefore, based on local conditions, you can always find material for any homemade product.
When collected natural material It is difficult to predict what exactly will go into making a particular craft, since creating toys is a creative process. A toy is sometimes born impromptu, so much more material is collected than is required for one or two classes. There should be a large selection of everything you need at hand.
Storing natural material is not difficult; the preparation technology for some of them will be discussed in the relevant sections. It is not recommended to store natural material in bulk. It must be sorted by type and stored either in folders or boxes. This makes it easier to find during work and contributes to better preservation.
Tools and accessories
To work with natural materials use various instruments. Thin branches are cut with a small penknife. For sawing, a fine-toothed saw is used, sometimes a jigsaw. The work requires a hammer, pliers, an awl, a small drill or a brace with a set of small drill diameter. Small parts made of natural material is difficult to handle in your hands, so to secure them, use a small vise or hold the parts with tweezers
Natural materials must be processed on a special table. If there is no such table, you can use an ordinary board for work, on which a board with a wedge-shaped cut is nailed to hold the parts. This device is used when planing wood on a carpentry bench.
Crafts from roots and branches

Roots of trees and shrubs - beautiful ornamental material. There is practically no root from which some kind of craft cannot be made. To do this, you just need to look closely, turn the root in your hands, and imagine the future craft. Accurate guidelines It is impossible to give instructions on making crafts from roots; this work is creative, purely individual and depends directly on the available material.
But you can give general advice. I would like to define the main one as follows: look closely, search, and you will find. Speaking specifically, first of all you should not take bulky roots - they are difficult to process. For future crafts, you need to cut off small roots from complex curves, various convexities and weaves, even if you don’t see anything there yet. They will definitely come in handy in the future. practical work. The collected roots must be shaken off the ground, washed in water, cut off the long stalks and dried well.
There are roots where some animal or fantastic monster is clearly visible. This material is easy to work with. But there are roots where you need to figuratively imagine the future craft. You should “put your hands on” such material, that is, cut something, remove something, add something. And finally, there are roots, where only individual details, parts of the presented craft, are visible. In such cases, you have to make one craft from several roots. You should not get carried away with this method, as the material loses its nature, thereby losing its originality.
From tree branches, as well as from roots, you can make a large number of various crafts. It must be remembered that you should not break branches of growing trees. The material is usually selected from pruning areas from already cut down trees. To work, you need small branches with many shoots. The principle of making toys is the same as from roots.


When making toys from bulk natural materials - pine cones, acorns, chestnuts - individual parts are made from branches: most often these are the arms and legs of various toys. The branches have an amazing structure that can convey the craft in almost any pose: running, sitting, with arms raised, etc. And all these details can be made from one small branch. The elbow and knee parts are where the branches fork, and the length is cut in proportion to the size of the craft.

In the practice of extracurricular activities, voluminous natural materials - pine cones, chestnuts, acorns - find a place. It is convenient because its shape allows you to convey the likeness of various creatures. However, despite its abundance, it is underutilized. This is due to a number of reasons: the complexity of processing, lack of experience, the difficulty of joining parts, etc. It is recommended to connect individual parts made of wood, branches, cones on wood glue. True, it is difficult to prepare; you need a glue maker, an electric stove, an outlet, and electrical wiring. Casein glue is easier to prepare, but it hardens for a long time - up to 12 hours. High-quality joining of parts is obtained with quick-setting adhesives: BF-2, BF-6, BF-88, "Phoenix", "Mars", PVA. In class I, it is more advisable to connect parts made of natural materials using plasticine.
The effectiveness of any lesson is determined by its effectiveness, that is, students must do some kind of craft in almost every lesson. Unproductive work causes reluctance, and then aversion to work. Therefore, it is necessary to find materials that students of a particular age group can process.
Processing buds for junior schoolchildren presents a certain difficulty. Operations such as sawing, drilling, piercing holes with an awl must be carried out in strict compliance with safety regulations. Cones should always be processed on a backing board, and not in your hands; in any case, the cutting and stabbing tool should be directed away from you; Drilling and piercing holes must be done in a special clamping device or in a vice. It must be remembered that dry cones are a very fragile material; it is difficult for children to pierce a hole in them with an awl, especially for first-graders, so these operations should be avoided if possible. It’s not easy to saw through cones either: to reduce their size, it’s better to use a small pruning shears garden trees and bushes. If possible, replace glue with plasticine.


This material is widespread throughout almost the entire territory of our country; collecting and storing it is not difficult. The best raw materials for processing are raw, freshly collected acorns. Over time, they dry out, the shell becomes fragile, and the dried cotyledons become very strong, so you need to work with them more carefully.
From acorns, using their natural shape, you can make many different homemade products, and also use them as additional material.
The joining of acorns is done on thorns, i.e. small sticks inserted into the holes of the acorns. It is easy to make holes in fresh, not dried acorns: they are either drilled or pierced with an awl, observing necessary measures precautions - the hand should not be against the piercing instrument, and the acorn should be secured in a clamping device on a backing board. If the acorn is dry, then the shell is pierced very carefully, glue is poured into the hole and then assembled. A hole must be drilled in the dry cotyledon.

The seeds of decorative chestnuts have rich ornamental properties. It is best to collect them after they have fallen from the trees. They are soft, well processed, and pierced with an awl. Dry chestnuts are more difficult to work with; holes must be drilled in them. The shelf life of chestnuts is practically unlimited. You should not keep them in a damp place - they become moldy and in a very dry place - they become hard as a rock. Heavily dried fruits can be placed in water for several hours; they will become softer, after which they are easier to process.
Chestnuts are connected in the same way as acorns.

Simple in execution, but original in shape, toys can be made from corn cobs without seeds. No cob processing required special effort And special tools.
From one cob you can make several interesting crafts. To do this, the cob is cut into pieces. If the cob is raw, it can be easily cut with a pocket knife. It is better to process a dry cob with a small file or jigsaw. The individual parts are connected with glue or thin sticks inserted into holes made with an awl. Small details: nose, eyes, etc. - are drawn or made using appliqué.


Tree seeds - maple, ash - have a beautiful external shape, which allows them to be used for original crafts.
Seeds are collected when they are not yet completely dry - dried seeds curl, become discolored, and lose their shape. Collected seeds free from the branches and leave the lionfish in pairs. Lay them out between newspapers, place a small weight on top and leave until completely dry. After 2-3 days the seeds will dry out. They are neatly placed in a box. The shelf life of dry seeds is unlimited.
The application of maple seeds is specific. The point is that in the drawing you need to save natural shape seed, so the traditional step-by-step approach - from sketch to craft - is less acceptable here. Working with maple seeds requires more imagination, creativity, and invention. Hence the peculiarity of the approach to work. First, they outline what they will do, then they lay out the seeds on a sheet of paper and, moving them, find the most expressive version of the application. It must be remembered that slight movement of the seeds changes the posture, expression, and dynamics of the transmitted image. Therefore, using the same sample, everyone can find their own original solution.
When the compositional option you like best is found, the seeds begin to be glued. Since maple seeds are large, you can apply glue not to the base, but to the seeds themselves. Used for small parts additional material.

For work, use ordinary sand. Original, simple in execution products are used as exhibition crafts, for decoration work room. First, prepare the drawing and transfer it to a base - thick paper, cardboard or painted plywood. Then the fragments, if the pattern is small, are completely greased with PVA glue and dry sand, free of pebbles and other impurities, is poured in.
When the glue dries, shake off the sand. So until the end of work. Finishing is done with colored pencils or felt-tip pens.

When processing wood, a lot of sawdust remains. They are usually thrown away, although they are a good craft material. The sawdust is sifted through a sieve to avoid large chips and painted required colors. They do it this way: gouache paints are diluted in jars, sawdust is poured into them and stirred with a stick so that the paint is well absorbed. When the desired color is obtained, the sawdust is poured onto newspaper and dried.
Mosaics can be made on colored cardboard, plywood, velvet, drawing and other thick paper. The drawing is transferred to the base and small areas it is lubricated with glue. Sawdust of the color required in the drawing is poured into this place. When the glue dries a little, shake off the remaining sawdust. The process is repeated until the work is completed. Small details are completed.
beautiful, original works are obtained from unpainted sawdust with a slight tint individual parts felt-tip pen on the finished mosaic.


A fun and accessible type of work for younger schoolchildren - application from various materials, including bird feathers. The material is prepared in advance, storage is not difficult. Before starting the lesson, it is very important to draw children’s attention to the aesthetic side, neatness, and proportions.
Although the process is simple, it requires precision. First of all, the object of the work is outlined: it is better if it is birds and animals, since the material itself allows you to express their naturalness. The selected design is transferred to cardboard or thick colored paper. It must be remembered that it is impossible to completely convey anatomical features; the main guideline should be convention, generalization, and expression of the most characteristic, therefore deviation from the drawing is not only possible, but sometimes necessary.
If the feathers are very large, then you can cut off the hard ends with scissors, and tear the feathers themselves along the stem. You can use both pure white and colored feathers. Natural colors allow you to convey the natural color of the selected object. When everything is ready to go, begin the application. Apply glue to the drawing in small strokes (PVA glue is best) and apply pre-selected feathers to it. You should not smear the entire pattern, as the glue dries quickly. Appliques must be made on an overlay - each subsequent feather should overlap the previous one with the fluffy part. The quality of work depends on this. When gluing the feather, the not completely fluffy part gives the product volume and hides the gluing points.
The final stage is the application of small parts: nose, eyes, beak. Here you can use colored paper, small buttons, beads, etc.


The creative scope of children in this type of work activity is limitless. You can start applique work from leaves with preschool age, since leaf applications are easy to make and at the same time original, catchy, and attractive.
Only fallen leaves can be collected. The best time to collect is late summer, early autumn, when the leaves become complex color palette. You should not take leaves that are too large; small and medium-sized ones are better suited for work. You need to collect leaves from under different trees and shrubs. Leaves of various herbs are used for applications. In winter, every blade of grass will come in handy.
To collect leaves, it is not necessary to organize long hikes and excursions. The necessary material can be found near the school, the house where the children live. Nature is generous, but it is necessary to warn children and make sure that they do not break off branches if they encounter a beautiful leafy bouquet. If leaves are collected in the forest, then the collection, especially the leaves of herbs, should be treated with no less caution. It is strictly forbidden to uproot flowers and herbs: this can cause irreparable damage to nature.
The collected leaves are sorted by type and laid out between newspaper sheets to dry. To prevent the leaves from warping, place a weight on top. After 5-10 hours, the newspaper sheets are replaced with dry ones. Dried, sorted leaves are stored in a folder. Leaves are applied on a white or colored background. For the base, use thin cardboard or thick paper. The natural shape, color, shades of the sheet allow you to convey a wide variety of objects, birds, animals, insects, human figures, technical structures.
When applying, one usually tries to preserve the natural shape of the leaf, but sometimes it is necessary to cut out individual parts from the leaves. You shouldn’t get carried away with this method, as this loses the attractiveness and originality of the craft, and a repulsive touch of artificiality appears.
It is advisable to start applique work from leaves with simple shapes or individual objects, gradually with the acquisition of work skills, complicating the composition and number of objects.
Before starting work, make several pencil sketches on a separate sheet of paper, taking into account the available material. There will certainly be changes in the appliqué itself, therefore, using a preliminary drawing, the most suitable method of compositional arrangement is found. best option conveying the expressiveness of the drawing. Only after this do they glue the leaves, lubricating them very thin layer or drops in several places.


Straw has been used as an ornamental material for a long time. Various useful things are made from it: hats, household items, toys, jewelry, inlays, appliqués.
The straw is the stem cereal plants, hollow inside, easy to process material. Products made from straw are very attractive and beautiful. They provide a lot of space for creative development children.
For application, cereal straw is used - rye, wheat, oats, barley; wild plants- bluegrass, timothy grass, etc.
Harvesting is done after the plants have ripened, when the straw acquires golden hue. The middle and lower parts of the cereals are suitable for work. The straw is cut together with the nodes or cut into pieces at the nodes - this makes it more convenient to store the material. Treated straw is unsuitable for work, as its stems are broken and crushed. It is better to use fresh, even, not crushed by a combine, unrotted straw. This straw is collected manually from the school plot or on the side of the fields.
To work, the straw must be prepared - flat ribbons are made from the tubes. First, select round, even stems, cut off the nodes and place the straw for 1.5-2 hours in a wide vessel with hot water for steaming. When the straw becomes soft, the tube is cut lengthwise and smoothed with a hot iron on newspaper folded several times. The material can be prepared for future use.
Looking at the finished crafts, it seems that straw applique is a difficult type of work. This is not entirely true. Indeed, the quality of some works sometimes leaves much to be desired, but this does not depend on the poor abilities of the children, but on the incorrect technology for making the appliqué. The most common mistake is that the appliqué is done directly on the base, adjusting each straw, which is very difficult to do in practice.
The technology of gluing straw strips is the most important stage of work. First, they outline the object of the craft, that is, create a sketch of the application. At the same time, various properties and specifics of the material are taken into account. The applique can be made voluminous using straws painted in various colors aniline dyes. Color shades can be shown by laying strips of straw in different directions. When the sketch is prepared, it is transferred in fragments (large parts), taking into account the direction of the stripes, onto thin, but quite strong, translucent paper. For application, glue is used that produces an elastic film, the best of which is PVA. Carpentry and casein glue, after drying, forms a hard, brittle film, which leads to defective work. Stationery glue is completely unsuitable, as it decomposes over time and spoils the products.
The paper is smeared with glue, onto which strips of straw are then placed in the direction indicated by the sketch. The strips are carefully adjusted so that there are no gaps between them. The ends of the strips should extend beyond the contour lines. This is how all fragments of the drawing are prepared. Then they turn the workpiece on the wrong side and cut off the excess paper along with the straw along the contour line with scissors. This achieves good quality work, the lines are smooth and neat.
For the base take dark background. The straw contrasts well with the black velvet paper, but you can use a different color. Fabric stretched on a stretcher or sheet of plywood is also used as a base.
The prepared fragments are placed on the base, the most successful compositional arrangement is found and glued. Then they do the finishing: they burn out some parts. A loop for hanging is glued to the finished craft on the reverse side.


This is a simple but beautiful toy. The stems of various cereal plants are used for work. From straws prepared in advance, cut stems for the head approximately 40-45 mm long (a), put them in a bundle and, stepping back 8-10 mm from the edges, tie them with thread or thin wire. For the body, blanks 110-120 mm long are cut (Fig. b).
Then four parts are cut from the branches for the legs and one for the neck (Fig. c, d). The ends of the branches are processed into a cone so that they can easily pierce the straw, and the parts are connected. The finished craft is colored with a felt-tip pen. The ears are made of paper (Fig. e).

A leaf is torn from the stem along with the petiole - it will serve as a mast. From the petiole side, stepping back a few centimeters, the leaf is bent so that the petiole is almost perpendicular to the leaf. From the fold side, dividing the sheet into three parts, make two breaks, connect the outer parts by inserting one part into the gap of the other, leaving the middle one free (Fig. a, b, c). Then, stepping back a few centimeters from the mast, a similar operation is performed with the other end of the sheet. Carefully make gaps in the long, remaining end and guide the mast through them. It turns out to be a boat with a sail. The rest of the sheet is torn off. The boat floats well when there are no waves (Fig. d).

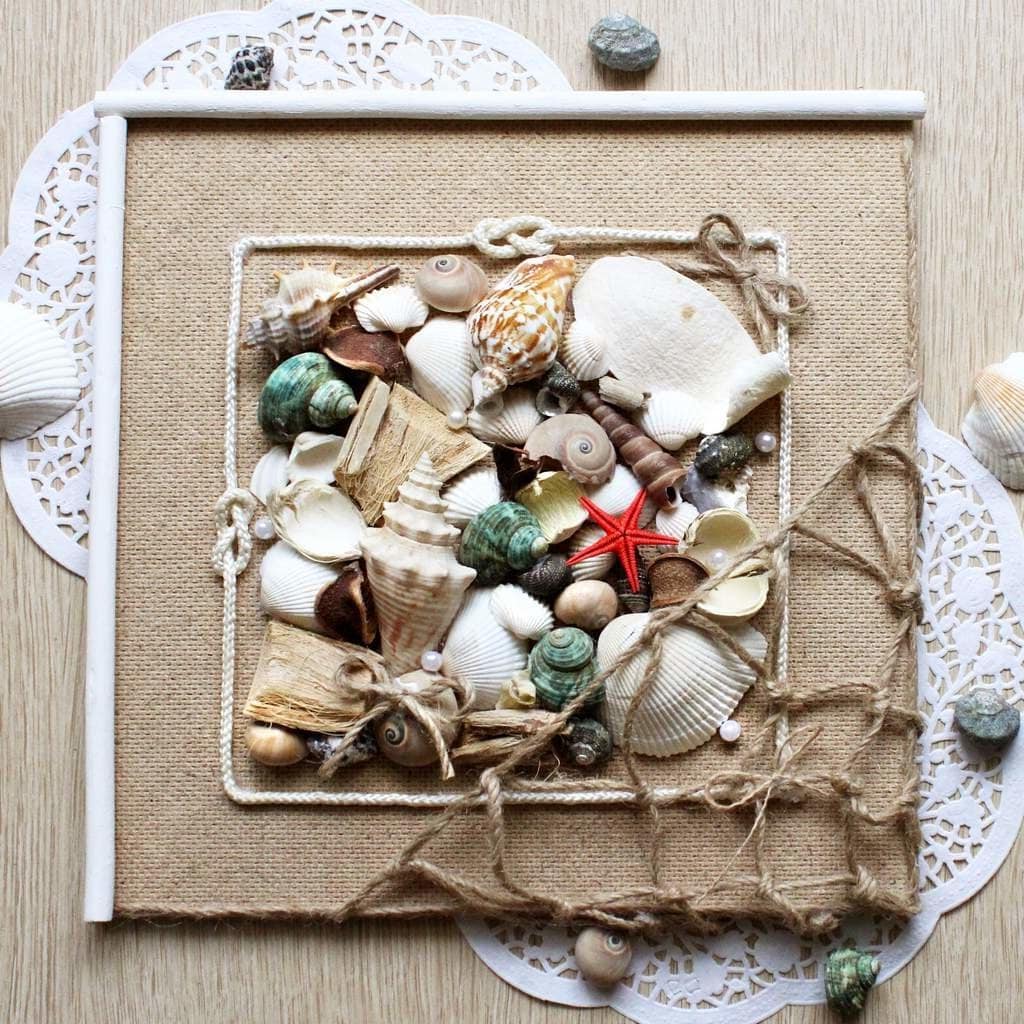
Various original crafts can be made from sea and river shells. Creative space is not limited here. The shells are collected in advance; storage is not difficult.
For the body, head and other parts, symmetrical pairs of shells are selected, placed together and glued. If the shells do not fit well together, they are processed using an emery stone to reduce the gap between them. The parts are joined with quick-drying adhesives: BF, "Mars", "Phoenix", supercement, "Moment-1", PVA, etc.
Such crafts are used as a souvenir, holiday gift, or birthday gift.
Nice toys can be made on a plywood base, painted in different colors.
What can I say about grapes?
The fact that it is rich in juice,
The fact that its juice is magical,
It is not simple, but healing.
(V. Stepanov)
We will need: acorns, wire, purple nail polish, green crepe paper.
We collect lots and lots of acorns and dry them at home for a while. Then you need to make a longitudinal hole about a millimeter in diameter in each acorn. We asked dad to drill holes, since the acorn's skin is hard and you can't just pierce it.
They strung acorns on a wire.
Then the most interesting part. We paint each acorn with nail polish, purple or green. Masha liked this activity so much that she painted acorns 3 times.
We fasten the wire from the sharp end of the acorn and make a small hook. We collect them in a bunch and fasten them with wire. Cut out leaves from paper. We wrap the twig with green paper and attach the leaves.

The grapes are ready!
Based on materials from the site:
site 1
Camping salt shaker with lid. Set of salt shakers
The basis of this lesson is also the study of angles, as in the previous article, but only now we will consider the weaving of narrowing angles and the formation of a narrow neck. These elements are quite often used in the manufacture of wicker household items from birch bark.
This is how vessels are created for storing bulk products (salt, sugar, tea and others). Environmentally friendly birch bark is undoubtedly still suitable today for the manufacture of food storage items. A salt shaker with a lid is suitable, for example, for taking various dry foods on a camping trip. Since this product has a lid or stopper, neither salt nor sugar will spill into your backpack.
For a complete set of salt shakers, we still need several types of products, and we continue to accumulate them. Now let’s add a salt shaker with a lid to the open tabletop salt shaker.
Start weaving as usual:
·Rug;
· Formation of corners;
·Glass.
Decide on the height of the future salt shaker at your discretion. Next, you need two intersecting strips that will form an angle strictly above the corner of the bottom. Now you need to cut the top tape. After this, run the second strip towards the bottom over the cut tape and weave it under several transverse cells to secure it. In this way, carefully weave the three remaining corners.


If everything is normal and the weaving principle is not violated, then we will proceed to the formation of the neck. Otherwise, you need to go back a few steps and find an error in the weaving.
Please note that the tapering corners form the shoulders. So the size of these hangers in the presented product will be only one cell wide.
At first glance, when narrowing, everything seems complicated, a bunch of intertwined ribbons, some of them are joined and it is not immediately clear what to put where. The pictures quite clearly show which ribbons need to be intertwined to form a neck.
Let me try to comment a little on the formation of the neck of our salt shaker. Opposite each hanger, two ribbons are intertwined, which belong to two adjacent hangers and come from the side that faces the selected tapering corner. If we did not want to form a neck, then one of these tapes would have to be cut, and the second should go over the cut tape. However, in this case, we would get a closed system and we would not have a salt shaker with a lid. By intertwining these ribbons without cuts, we raise a new wall.


Next we have to weave a narrower glass and after several intricacies we can form the edge. The last lecture told us how to braid a simple edge; here you need to use the same edge. Then braid the entire product with the front layer facing out. Tape extensions were discussed in the last lesson and you shouldn’t have any questions with this.


To weave a lid for a salt shaker, ribbons of the same width will no longer work; to do this, you need to take wider strips and weave a cup according to the principle of an open salt shaker. The size of the rug in our case is 2X2. Or use narrower ribbons and a 4x4 mat size.
It is also possible to use a cork rather than a lid. It is planed from non-resinous wood (preferably birch to preserve the style!) in a cubic shape. Then a shallow groove is cut into it and tied with a ribbon of rawhide or twine so that the cork does not fall inside the salt shaker.
Now our set consists of closed and open salt shakers. Similar salt shakers can be woven various diameters and sizes and can be used not only for salt. The most important aspect is the tightness of the weaving and the connection of the lid to the salt shaker, so that the bulk product does not shake along the way through holes and cracks.
Crafts from branches
From any, at first glance, usually
vein branch, you can make origicash craft. Take a closer look, nois there any hidden secret in her cunning curve?be a fantastic creature. Please paypay attention to broken branches. Their kinkcan give the craft a unique look roving.Mouse
site 1Let's start with a simple toy madefrom a single piece of branch. From the workpieceCarefully remove the bark. Sharpen one end of the branch into a cone and clean off the chalkgritty sandpaper.
Make two with a knife or chiselcut. The resulting flakes are slightlylift up. These are the “ears” of the mouse. TaMake “paws” using the same method.
“Tail” - secure the willow twig inholes pierced with an awl.
Cut the stand from a small piecelike a thick branch.
Cat
To make this toy you needwill need branches different thicknesses. From odNoah, with a diameter of 30 mm, you can make onetrap and head. From a thinner paw and tail.
To connect the parts, on eachuse an awl to make holes in the place of the crepeleniya. Insert matches and glue.
Cut off the “tail” branch on one sideat an angle and glue it to the “body”.
Make the “ears” of the flakes with a chisel andlift up. Draw the eyes and mouth with a felt-tip pen.
Leaf crafts


Based on materials from sites:
Crafts from roots

![]()


According to the site:
Fruit crafts:


According to the site:
Grass crafts:

According to the site:
Moss crafts:
According to the site:
Works made from materials of animal origin:
Leather crafts:
![]()

According to the site:
In order to correctly use various natural materials, you need to know their properties and characteristics during processing and behavior in the finished product. It may turn out that a natural material with an interesting shape is difficult to process: it is either very hard or crumbles and breaks. But it happens, on the contrary, that a beautiful and pliable material after some time becomes deformed or changes its color, and the craft becomes unusable. In order not to be upset later, you should know how using glue, varnish or dyes you can improve or even change the properties of many natural materials.
In various crafts, the same natural material can act as the main or auxiliary material.
Individual details: arms, legs, beards of men, shoes, beaks of birds, sea waves made from so-called auxiliary materials. For example, legs, arms, noses are made from sticks and twigs, beards are made from moss and lichen, shoes are made from halves of acorns or pine nuts, seeds or logs, waves - from birch bark (Fig. 13), caps - from the green shell of hazelnuts (Fig. 6), and bird heads - from beans (Fig. 14).
With each new craft made comes experience, thanks to which you yourself will find options for making certain parts. By choosing different natural materials, you will see how different the results are and how interesting it is to combine different materials.
BRANCHES OF TREES AND SHRUBS.
To make arms and legs for figures of men and paws of animals, branches of lilac, dogwood and other species of trees and shrubs, whose young shoots are shaped like slingshots, are perfect (Fig. 7). And the branches of willow and redwood make excellent bird legs, since their bark is red.
It is advisable to select the knots from which the human limbs will be made so that the slingshots have thickenings similar to joints. When making legs, the bark is partially removed from the knots. If you leave a little bark at the bottom of the “leg” knot, you will get a “sock”, and if at the top, then you will get panties. At the same time, the branches act as connecting elements, pins, with the help of which the individual parts of the craft are connected to each other. But some tree species have too soft wood, which, when dried, becomes brittle and brittle. Therefore in the forests middle zone and northern regions of Russia, we recommend collecting branches of spruce, lilac and birch, and in the south also branches of hornbeam and dogwood, since it is on them that it is easy to pick up the necessary knots. Don’t break off living branches, look and in any forest you will find a tree with dry branches! But be careful, do not take dry, brittle branches.
The thickness of the knots is selected in accordance with the size of the figurine. If the sticks are carried additional function- connections of parts, then they need to be not too thick (it will be difficult to insert) and not too thin (they may break, unable to withstand the weight of the figure).
To make shoes, small logs are sawn off from thick branches. Then they split them in half (Fig. 8 a) and holes are drilled in each half, into which sticks are then inserted (Fig. 8 b). The bark is left only if the little man needs to be “put on bast shoes.” To do this, the bark on the logs is cut into “cells” and the tip of a knife is carefully removed from some of the cells into checkerboard pattern. It turns out very similar to ancient Russian shoes - bast shoes.
From thick and thin sticks you can make RAFT WITH SAIL from a maple leaf or a piece of birch bark (Fig. 9). Branches of aspen, willow or bird cherry are best suited for this.
First, prepare three “logs” of the same length with pointed ends (part 1). Drill two holes in each. Then take two thin sticks (part 2), make three through holes and six short pegs (part 3) in them.
Cut a steering wheel from a twig with a knot (part 4). And from a long thin branch, splitting it in the middle by two-thirds of the length, make a mast (part 5). Having prepared all the parts, assemble them as shown in Figure 9, after inserting a maple leaf or a rectangular piece of thin birch bark into the mast slot. After assembling the raft, make a hole in the middle log and insert it into the mast.
PLANT ROOTS.
Roots come in a variety of shapes, so they can be used in various crafts and compositions. But mainly they serve to imitate trees in small compositions. The dried roots of small Christmas trees are best suited for this. The roots of gooseberries and currants are also suitable for crafts. The roots of these shrubs lend themselves well to processing: they are easy to cut, drill, and glue well. In some products they act as the main material. For example, from a large root you can make an extraordinary floor vase.
PLANT BULBS.
This is a perishable material. But the bulbs are quite suitable for crafts that do not pretend to be long-term storage, for example, toys for the Christmas tree. You can also make original and funny toys and figurines. Their main advantage is ease of manufacture and availability of the material at any time of the year (Fig. 10).
The bulbs are easily cut with a knife and pierced with an awl. The shape of the bulbs allows you to create crafts instantly, without finishing almost anything. For example, Figure 10a shows the head CHIPPOLINO. All you have to do is attach the eyes, nose and mouth to the onion - and the head is ready! Heads are made in the same way OLD MAN And MATRYOSHKA(Fig. 10 6, c). If you pass a thick thread with a loop at one end through the entire onion and tie a knot at the bottom of the onion, then the figurine can be hung on christmas tree.
TREE BARK.
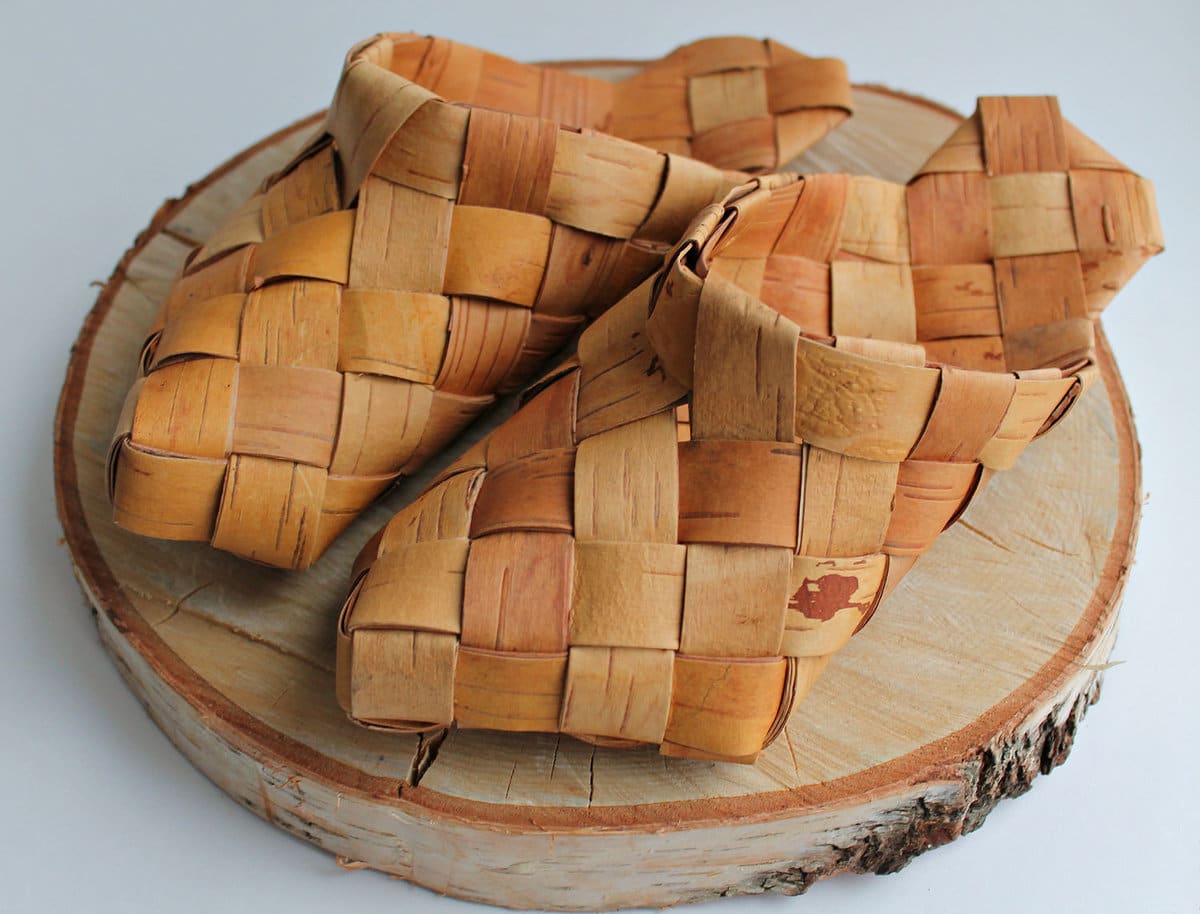
Any bark is suitable for crafts. It all depends on the specific composition and imagination of the author. The most valuable are pine, oak, linden and birch bark.
Thick birch (or pine) bark is suitable for making any stand. It is also used to create individual parts (Fig. 11), cut out boats, rocks, and various figures. For example, try doing BOAT(Fig. 12). From a piece of pine bark, cut out the body of the boat (part 1) and the steering wheel (part 2). Make sails from two pieces of birch bark (parts 3 and 4), and a mast from a planed stick (part 5). Assemble the boat as shown in Figure 12.
Birch bark makes good sea waves (Fig. 13), kerchiefs, hats, handbags, buckets, and bird legs (geese, ducks, herons).
The bark retains its softness, plasticity, color for a long time, and is easy to process. But when preparing bark for crafts, you should keep in mind that, for example, pine bark, when dried, separates into separate plates. Therefore, in order for it to better preserve its properties, it must be glued and varnished.
LICENSE SEEDS.
On maple, hornbeam, ash and linden trees, winged seeds ripen in the fall - a natural material necessary for crafts (Fig. 15). Winged seeds are harvested when they are ripe, but still have a greenish color and are fastened in pairs. If they are collected during this period, they remain in “working” condition for a long time.
Winged seeds should be stored in cardboard box, separately from other raw materials, and make sure that they do not dry out or crack.
Animal ears (hares, squirrels), heads and tail feathers of birds are made from winged seeds (Fig. 17), various clothes[skirts (Fig. 16), dresses] for little men and much more.
THISTLE AND BURDRY FLOWERS
An unusually expressive and interesting natural material for crafts (Fig. 18 a). From them you can make the heads of little men (Fig. 18 6), the faces of hares, cats, dogs and other animals. Collecting thistle and burdock inflorescences is quite difficult because of the thin sharp needles covering both the inflorescence itself and the stem and leaves. Having collected thistle inflorescences, they must be treated at home with liquid carpenter's glue, otherwise, when drying, they will open up and scatter into a thousand fluffs.
Be careful when working with burdock inflorescences. Numerous small hooks on burdock scales cling tightly to clothing and to each other.
MOSS, MOSS, LICHEN
Moss mosses are often found in damp moss forests. Moss moss is an interesting and often used ornamental natural material. It makes good additional elements, for example, deer antlers (Fig. 19 a) or a girl’s pigtails (Fig. 19 b).
Moss and lichens grow in coniferous and mixed forests. Lichens often cover trees, hanging from branches or twining around the trunk. This is a wonderful natural material for making beards and mustaches of little men, creating compositions of a fabulous dense forest.
Harvested mosses, mosses and lichens, before being used in crafts, must be dried well in a suspended state or in a herbarium folder.
How to do this correctly is described in the article “The Second Life of Plants.”
FRUITS OF WATER LILY.
In place of faded beautiful white and yellow water lilies, which are often found in quiet river backwaters of rivers and lakes, fruits of original shape are set (Fig. 20 a). These fruits are very fleshy and are suitable for crafts only when well dried. As they dry, they wrinkle somewhat, but this gives them an even more interesting shape.
Such fruits make wonderful pig stigmas (Fig. 20 b).
ALDER CONES.
At the end of summer, clusters of fruits form on the alder - cones, whose shape resembles unripe raspberries. If these cones are collected at the end of July and treated with glue, you will get an excellent natural ornamental material, from which you can then make human fists, animal paws and bird heads.
This is a universal ornamental natural material, from which various and beautiful products and toys. For the crafts presented on this site, you will need rye, oat and wheat straw as an additional auxiliary material. Straw can be easily processed: smoothed, cut and painted.
To create crafts, you will need straw, both round and flattened, carefully smoothed. For those who are unfamiliar with straw processing, let us give some useful tips.
For work, you need to choose fresh, even straw that is not crushed, rotten or moldy. It is collected by hand. The straw stems are cleared of leaves and the roots are trimmed with scissors. For storage, straw stems should be cut into pieces (by nodes) and carefully placed in a box.
Flat straws are made from round and even stems. They are placed in boiling water, the container is covered with a lid and left to steam for several hours. Having been removed from the water after steaming, the straw is cut lengthwise with small scissors or sharp knife(Fig. 21 a, b). Then the cut straw is smoothed on both sides with a hot iron (Fig. 21 c). If you iron for a long time, you can change the color of the straw from golden to dark brown.
Straw can be dyed in another way - simply by boiling it in a solution of aniline dye. The color saturation depends on the duration of boiling. In this case, you can get any color you choose.
Polina Legostaeva
Natural materials- these are the most affordable materials that you can think of. Very often in kindergarten use natural material for making various crafts. Moreover, the collection natural materials- This is also a very useful pastime. So, on a regular walk with your child, it is very easy to involve him in searching "treasure". Of course, your child will find it interesting, and most importantly, educational, to collect and find interesting-looking leaves, intricate sticks, and cones of different sizes. This alone makes an irreplaceable contribution to child development. Indeed, in the process of such work, children learn about the world, learn nature in its smallest detail.
IN groups early development application and use of natural material differs in its simplicity and uncomplicatedness from crafts that are made in older groups. Children early development are not yet able to perform complex work, since they do not yet have enough imagination is developed, not so rich lexicon. Therefore, the main emphasis when working with natural material in such groups accounts for the tactile sensations of children. Examining and feeling leaves and cones, stroking pebbles, children develop artistic taste, creative imagination, a non-standard view of ordinary things is manifested. Working with natural material, the child gets acquainted with its properties, it has develops fine muscles of the hands, design abilities, coordination of movements, dexterity, ingenuity, hard work, perseverance and patience.
Classes with natural material usually carried out in the first half of the day. This makes it possible to quickly interest the child and involve him in work. IN early development groups It is quite difficult to work with all children at the same time. Therefore justified use a subgroup working method: take 3-5 children, which will allow you to see each child and thus make it easier to carry out individual assistance, control over the actions of the guys. Another feature of classes with kids is temporary framework: maximum time for creative work is no more than 10 – 15 minutes. This is due to the fact that children get tired quickly, they lose interest, and their attention wanders. Also in early development groups You should not conduct classes according to the plan, especially at first, when children have not yet learned to correlate plans with their capabilities, when their practical skills are still imperfect, it is not enough developed ability to analyze upcoming work. It is very important that at each stage of work the child acts actively and with good mood. Only in this case creativity will bring useful results, and the child’s genuine interest in this type manual labor will be the basis for the formation of a positive attitude towards work in general.
Now let's look at some types of plants material, most often used for crafts in kindergarten.
Fruit coniferous trees– cones – wonderful material for bulky toys. In shape they resemble parts of the body of animals and humans. It is advisable to collect cones on moist soil so that they dry out more slowly and retain their shape longer.
In kindergarten, when making toys, you can use forest, walnuts, groundnuts and pine nuts, pistachios. Shell walnuts used for making boats, carts, turtles, beetles, etc. Pine nuts can be useful as an additional material for making paws of forest animals, fists of forest men. Hazelnuts used as a material for making heads of toy men and animals (head of a cockerel, hare, etc.)
Chestnut fruits are good material for making simple toys. They have a beautiful shiny surface and bright brown color. Whole chestnut fruits can be use for making doll heads and torsos.
Oak fruits - acorns - come in different shapes and sizes. They ripen in September–October and it is recommended to harvest them when they are ripe and falling. For making toys use the acorns themselves and the cups (the pluses on which they are held. Acorns are very convenient for making figurines of funny people, animals, various parts for toys from other natural material. A giraffe, a heron, a horse are made from oblong acorns, and the head can be made from a small acorn, and the body from an oblong one.
Various branches are used in the manufacture of some parts crafts: arms, legs, neck, etc. For this purpose it is better use pine branches, spruce, lilac.
The roots sometimes, with their bizarre shapes, resemble animals or parts of their bodies. Children's imagination in curved roots will help you see an octopus, spider, etc. Many old roots or their shoots can be found along river banks. When collecting this material Children need to be reminded that the roots of living trees are inviolable.
They can come in a wide variety of shapes and colors. Children use large oak and maple leaves as a sail for a yacht, raft, or steamship. Leaves can also be use for making butterfly wings, fish fins. Collect leaves better in autumn when they are especially beautiful. Collected The leaves are placed between paper sheets and ironed with a warm iron.
From maple and ash seeds you can make wings for a dragonfly and ears for a hare. You can make a beautiful applique from the seeds of zucchini, pumpkin, watermelon and melon. It is better to collect seeds in the fall.
You can note general scheme manufacturing sequences crafts:
1) Examination and analysis of a toy sample.
2) Establishment of the step-by-step sequence of its production.
3) Selecting a method for connecting parts of the toy.
4) Selection material and tools.
5) Making a toy.
6)Analysis and evaluation of crafts.
I would like to sum up my conversation with the words of V.A. Sukhomlinsky:
“The origins of children’s abilities and talents are at their fingertips; from their fingers, figuratively speaking, go the thinnest streams that feed the source of creative thought.”
Creative activities with natural material in early development groups


Legostaeva Polina
Veliky Novgorod
MADOU No. 72 "Firefly"
In order to create a cozy atmosphere in your home, every detail intended to decorate the interior must clearly fit into its overall style. The decorative sound of various accessories will help to emphasize the dignity of the interior, highlighting the advantages and hiding the disadvantages. One of these creations of home art are handicrafts made from natural materials. From our article you will learn how, with the help of simple things that surround us, you can create exquisite jewelry and original items decor. The master classes below with photos and step by step guide, and different ideas for home, garden, school and kindergarten, will help you cope with this task with ease.
Beautiful crafts: do it quickly and easily (photo)
Kanzashi, topiary, decoupage, flower pots, origami - the world of handmade art tirelessly excites the imagination of needlewomen.
A variety of crafts made from wood, glass, shells, cereals, coffee beans, pasta, paper, stones, pebbles and other natural materials will help create unique comfort and a light romantic mood in any interior.
Advice! You can create a variety of supplies for making crafts from natural materials from absolutely anything, just look around, you probably have a lot of things suitable for this at home.


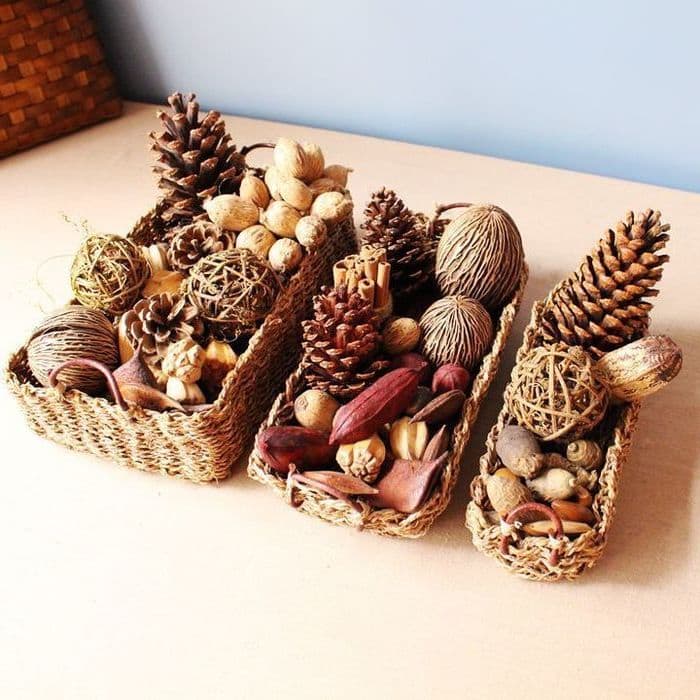
Lesnoy and pine nut, beans, buckwheat, peas, coriander, pepper - are excellent materials for creativity

Advice! So that handicraft creativity brings you exceptional positive emotions, and the process of preparing material has turned into a real holiday, you can combine business with pleasure.
- When you're at sea in the summer, stock up on beautiful shells and small pebbles. They make excellent wall decoration for home.
- While walking through the autumn park, give your child the task of collecting acorns, chestnuts, and colorful fallen leaves. Products made from natural materials made by children's hands are endowed with special warmth and love.
- Caring for own garden, don’t be lazy to sow dried flower seeds. They store well in winter and are an ideal tool for creative work.

Crafts made from natural wood
Tree- a beautiful and pliable material that has gained popularity among designers, architects and ordinary amateurs. Natural solid wood can be easily combined with metal, glass, plastic and stone decor.
Wooden crafts will harmoniously fit into cozy room country style, will set the tone for the brutal loft style, and will favorably change the classic, Scandinavian, minimalist decor.


We invite you to view universal selection interesting wood products that can transform the design of any interior, becoming its beautiful and bright accent:
Tree branches
– a sophisticated natural material that allows you to create many original things for your home with your own hands: chandeliers, wall lamps, candlesticks, photo frames, hangers, headboards and much more.
- Painted dry branches with many branches will add special charm to the living room, kitchen, and bathroom.
- Tables, lamps, shelves, vases finished with sawn wood look nice.
- A romantic mood will be set by decorative panels in the shape of a heart, a bird, or a star.
- Gold, silver, white, and black rods placed in a transparent vase with stones attract attention.


Wood cuts
Tree cuts help create larger crafts: vases, clocks, frames, stylized wreaths. Wooden flower pots, shelves, and hot stands will fit harmoniously into the interior.
With a little imagination, it will be easy for craftsmen to build from these round pieces unusual tabletop, fixing the tree cuts on plywood sheet, filling the voids with shavings and opening them with varnish.


Bark of tree
Bark is natural and available material. Modern craftsmen use birch bark to create unique paintings and appliques. Mugs, baskets, containers and boxes made of birch bark will last for decades.
Crafts made from natural materials will help not only unleash your creative potential, but also turn your interior ideas into reality.

Decorative stone and pebbles
- Decorative rock— the unbridled power of the elements, which has a strong charge, which affects the overall design concept of personal plots, interior decoration premises.
Chests, caskets, vases filled with pebbles will dilute the routine atmosphere of city apartments and office premises. Small stones will decorate walls, mirrors, door handles, stands for installations, as well as bottles. Look at the examples in the photo.

An interesting solution would be candlestick from glass bottle filled with shells and colorful pebbles. Beautiful ones will look no less beautiful pebbles glued to the wall.
A decorative rug covered with flat pebbles mounted on silicone or special glue looks unusual and elegant. It will make your porch look stylish and beautiful.
Even children can create original compositions from stones. Just before that, you need to conduct a step-by-step master class for them.


Mosaic, painting, stone cutting- a great way to entertain children by creating magnets, flower arrangements, trees, cacti in decorated pots.
Advice! It is best to paint sea pebbles in one tone using special spray cans, but you need to apply drawings and fine lines on them using liner brushes.


- Decorative panels and figurines are made from multi-colored stones. Pebble cladding of walls, floors, fireplaces and window sills - the basis of kitchens and toilets.

A picture made of stones is a unique interior item

Summer crafts from fruits, leaves and flowers
Formation of a caring and caring attitude towards environment form activities with natural materials. An important stage of the work is the collection, processing and preparation for use of summer gifts.
You can make beautiful and original home accessories with your children’s hands from:
- leaves;
- poplar fluff;
- colors;
- seeds
Dry grass, fruits, flowers, tree fruits and plant seeds allow you to create complex volumetric applications, unique and colorful compositions and other original art objects on autumn and summer themes.


Advice! If wood (cuts, logs, bark, twigs) is used to create crafts from natural materials, it should be thoroughly dried before starting work. Using damp wood will significantly shorten the life of your homemade masterpieces.
Ideas for creating autumn crafts
Autumn is the best time to collect fruits, seeds, vegetables, as well as acorns, pine cones and chestnuts. Fallen leaves, dried flowers, grass will serve to create extraordinary bouquets, wreaths, and appliqués.


Natural compositions look good in ordinary vases, watermelon peels, coconut shells, and pumpkin shells. Original master class You can teach children how to create crafts from natural materials with their own hands.
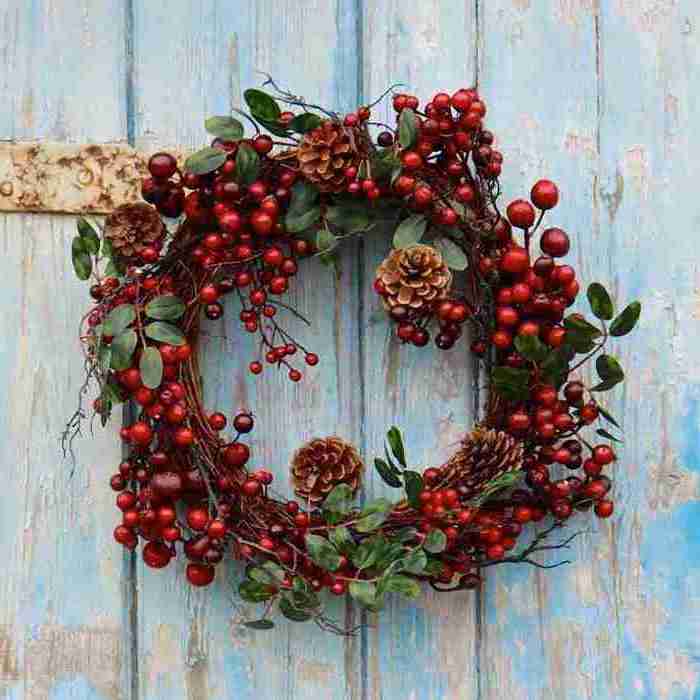
- The pine cones will make a cozy basket or wreath that can be hung on the front door.
- Zucchini decorated with berries and flowers will become the main character of the garden plot.
- A kaleidoscope of bright colors of pumpkins, potatoes, and eggplants will decorate your yard landscape if you come up with a worthy use for them.


Advice! When looking for ideas for creating crafts for kindergarten, pay attention to the wonderful houses made from bark and tree branches.


Crafts on the theme: “Sea and underwater world”
Marine crafts give bright emotions and a rosy mood even cold winter. If you are lucky enough to collect a collection of shells during your vacation, hurry up to become the authors of three-dimensional applications, paintings, frames, a marine theater or an aquarium.
- Sea treasures are easily transformed into beads, pendants and pendants.
- Cold porcelain, salty dough will help complement the composition with starfish, corals, and colored pebbles.
- The ocean in a bottle is whole undersea world, allowing you to invent various stories, study marine life.
- On a cool day, boats made from scrap materials will also give you warm memories of summer.

When making marine-themed decor, don’t limit yourself to anything - create, try, dare

When making products with a “sea” theme, you can use absolutely any natural material.

Feathers for needlework
- Bird feathers- used by craftswomen to create soft pillows, warm feather beds, decorations for hats, toys, unusual souvenirs.
They also decorate the interior, complementing crafts with sequins, glitter, small ribbon bows and other decor.


Despite the fact that the pen is a very capricious material, working with it is quite simple and easy

Dreamcatcher - a magical talisman that attracts good luck


Important! Bird feathers can cause a severe allergic reaction in humans, so be careful when using them as decorative decoration for home.
DIY crafts (step by step)
It’s easy to create crafts from natural materials with your own hands - the main thing is to get the necessary tools and materials. The following step-by-step instructions for creating universal decor for your home and garden will help you complete this simple task.
Colorful panel
Panel - decorative, facades. Currently, three main genres are used for its production: sculptural, mosaic and appliqué.
An interesting solution is artistic panel from natural materials: dry leaves, straw, nut shells, dried flowers. Its production takes place in 3 simple steps:
- First you need to make a base. It can be made from wooden planks knocked into a board or piece of plywood.
- Next, you need to cover the base with burlap material or make a straw lattice on top of it, on which the applique will be applied. You can make an application from flat elements(leaves, grains, seeds), or get a relief surface by combining volumetric details. An unusual solution There will be dried citrus fruits, moss and leaves woven into the straw net.
- The final stage is to create a rope or wire loop for attaching the panel to the wall. Check out the result in the photo!
Advice! If desired, you can add a frame of driftwood or vine branches to the resulting composition. It will make your work more elegant


Eggshells for indoor plants
Creating small flowerpots from eggshells requires special care, since the shell itself is a rather fragile material and can easily be damaged if moved carelessly.
Procedure:
- Prick top part raw egg and pour the contents into the container.
- Process the edges until you get an even cut or leave them chipped.
- Stabilize your vases by using a stand or egg carton. An alternative option could be a plasticine flagellum that complements the bottom of the shell.
- The resulting container is ready for seedlings of wildflowers, greenery, moss, and small succulents.
Interesting to know! Eggshell Can also be an elegant candle holder, Easter craft or miniature flower bed.


To create your own mini-garden, you will need very little time, the main thing is to do everything carefully and adhere to the rules described above.


Candlesticks made from sawn wood
Preparing an exclusive candlestick from a stump or wood cut will take a minimum of time and effort. Enlist necessary material and tools to perform the following actions:
- Soak up wooden base compounds that prevent the formation of rot and insect pests.
- Using a drill and a special attachment, make a shallow hole in the center of the stump to install a standard candle. To ensure that the edges do not pose a danger, sand them with sandpaper.
- Decorate the item with burlap, tied with jute rope or a beautiful ribbon.
A wooden stand for 2-3 candles, made from simple driftwood attached to a wall, pendants or supports, will look unusual. Such an interesting handmade product will be the best attribute for romantic evenings.


Kitchen clock
A kitchen clock made from cutlery is very quick and easy to make. For this we need:
- clock mechanism with a beautiful dial;
- disposable plastic spoons and forks;
- glue gun.

Step-by-step master class
- First you need to disassemble the watch, separating the mechanism from the dial;
- Next, using a glue gun, we glue improvised arrows opposite each number so that the spoons and forks alternate and go one after the other. This way the watch will look much nicer;
- All that remains is to let the glue dry, install the dial in place and insert the battery into the watch. Original and useful is ready!

Let's sum it up
It’s not difficult to make decor for your home, cottage, school, or kindergarten with your own hands, especially if you use natural material for this, which is a pleasure to work with.

You just need to enlist the help of your family and friends, use your imagination, and boldly create! Try, experiment, find your own!


