Is it possible to reduce the telescopic curtain rod for a bathroom? Bathroom curtain rod. How to install a corner curtain rod for a bathroom
The bathroom is a room with a high level of humidity. Installing special curtain rods in the bathroom will help protect the floor, walls, and mirrors from splashes during water procedures. In this article we will tell you how to install a bathroom curtain, that is, in two stages:
1. Install the bathroom curtain mount
2. Hang a curtain in the bathroom.
The abundance of bathtubs of various shapes requires the installation of curtain rods of suitable lines. Thanks to the suggestion construction stores and markets, can be easily installed different mounts for the bath, and hang all kinds of curtain models.
Curtains are made from various materials: fabric, polyethylene, polyester.
Tubes for curtains are made of metal and plastic, which have corresponding advantages and disadvantages. There are devices on the market with different installation methods. The choice of fastening type is determined by the wishes of the residents, as well as the shape of the container or shower.
How to install cornices: types of installation, stages of work
The main points for installing figured and corner structures are similar. Corner structures can be monolithic, or self-assembled from a suitable size furniture fittings. In the second case, you should purchase in advance required quantity straight or corner connecting elements, to eliminate the phenomenon of play at the connection points.
When installing curved rods of considerable length, it is necessary to provide for the placement of additional vertical fasteners. If there is no shower room suspended structures, That great option auxiliary fixation – ceiling. If the geometry of the bath and the layout of the room allow, you can additionally attach a bent rod to the opposite or adjacent wall, especially when heavy fabric curtains are hung, which become significantly heavier when wet.
When attaching structures, it is important that the tube is positioned parallel to the edge of the bathtub.
Sequence of work when installing a device with flanges
For structures of this type, tubes are made of polished stainless steel, thin-walled steel with a protective coating, and aluminum.
 Curtain rod for bathroom curtains made of polished metal
 - Positive aspects of installing the structure: reliable type of fastening, ability to withstand heavy loads.
- Complicating points: the need to preparatory work(depending on the type of wall, a hammer drill may be needed). The curtain mount is usually equipped with the following parts: flanges, rod, screws, dowels.
Flange - element round shape with holes (symmetrically located), designed to firmly attach the curtain pipe to the wall surface.
 Model of a cornice with a flange and a wide decorative cap
 To install the structure, you will need tools: pencil, tape measure, drill, screwdriver, hammer drill, building level.

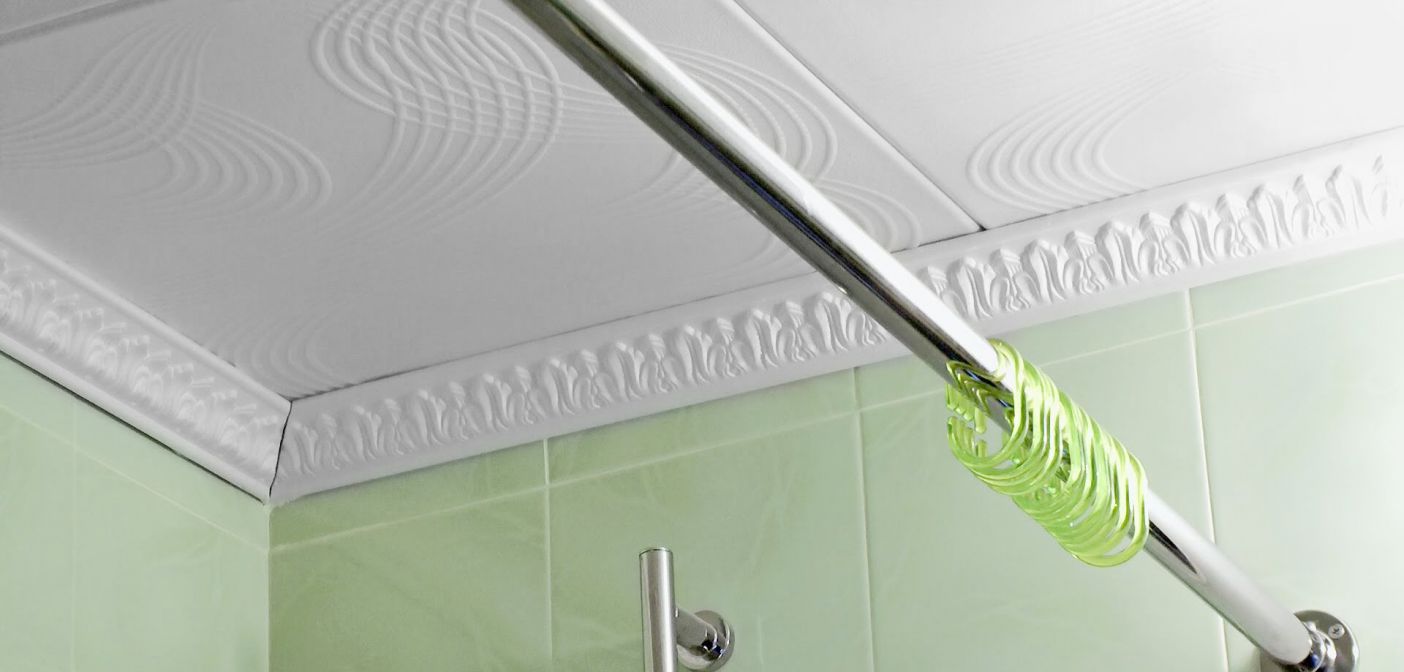
Installation of a curtain rod with a telescopic mechanism
The design consists of two tubes of different diameters and an ejector spring. The ends of the device have anti-slip rubber seals. The rods are made of durable plastic or metal (aluminum, steel). Single- and double-row models are offered in construction markets. For the bathroom, the double-row design allows you to hang a curtain and a towel (which is very convenient when taking a shower).
 Installing a bathroom rod on tiles photo
 Advantages of the model: no tools or special preparatory work required; the ability to adjust the length (designs are sold with parameters 75-120 cm, 125-220 cm, 140-250 cm); variety of shades (easy to match to the design of the room).
Disadvantages: You can only use light curtains. Even before hanging a curtain in the bathroom, you need to correctly calculate its capabilities. If there is a significant load on the structure or if there is a sharp pull on the canvas, the stick can fall.
To correctly position the cornice in space, you will need a pencil and, preferably, use a building level.
- The location of the structure is marked with a pencil. At this stage, it is important to know how to hang the curtain correctly: its lower edge should go down 15-20 cm into the bathtub.
- The packaging is unsealed and the rod is expanded to a length equal to the distance between the walls (where the container is located), plus 0.6-1 cm.
- Rings or permanent hooks are strung onto the tube.
- The rod is fixed in the marked places. Its final horizontal position is determined using a building level.
Corner structure: rules and installation steps
When placing a bathtub of a non-standard shape, it is important that the line of the cornice follows the curve of the front edge of the tank.
The model with an angular rod is made of metal or metal-plastic. Depending on the type of bathtub or shower, the structure is mounted on adjacent walls or one wall (U-shaped tube).
For installation you will need: a hammer drill, self-tapping screws and plastic dowels, a pencil, a building level.

The design of the cornice and curtains not only performs a protective role, but is also a design element. Therefore, before hanging a curtain in the bathroom, you should take into account not only the quality of the walls, the complexity of installation, but also the style of the room. If it is difficult to install suitable devices with your own hands, then it is better to use the help of professionals.
 Straight rod for bathroom curtains
 Each item in a small apartment is selected based on the principle of convenience and functionality. A bathroom curtain rod is an indispensable element in the design of any bathroom. Since Soviet times, to attach protective curtains, they bought an ordinary crossbar, which is colloquially called a “stick”. It fits perfectly into a rectangular bathroom and is still the most common type of curtain holder.
The curtain rod in the bathroom is an indispensable element in the arrangement of any bathroom.
But the idea of bathroom design is constantly changing, and along with it, the shower curtain rod is being modernized. The selection criterion is increasingly becoming not only practicality, but also appearance holder that must fit into general interior each specific room.
Product types
Straight products are ideal for standard baths, placed in niches. They are ordinary crossbars installed between two opposite walls. If, for aesthetic reasons, drilling walls is not provided, you can opt for sliding structures. For example, on a holder made in the form of two pipes connected by thread. Although such spacers are increasingly being replaced by spring structures. The telescopic rod is convenient due to its versatility. It can be bought without preliminary measurements and adjusted to the desired area like a telescope thanks to the spring hidden inside.
Curly curtain holders in the bathroom look more stylish and modern.
For a corner or classic bath placed in the corner of the bathtub, a corner bar in the shape of the letter L, semicircular or arched is suitable.
A U-shaped guide is used to enclose a free-standing bathtub near the wall. A ring cornice will complement the style of a round bathtub. Corresponding load-bearing elements are also produced for asymmetrical bathtubs. Modern technologies allow us to produce curtain rods for all types of bathtubs in any location.
Return to contents
Materials used

There are 2 types of bathroom curtain sticks in shape: straight and curly.
In addition to the shape, curtain holders in the bathroom differ in material. There are a large number of plastic and metal structures made of stainless steel and aluminum on the market. There are more original options execution, for example, from wood, glass or bronze. But if we talk about practicality, then it is better to opt for the first two options.
A clear advantage plastic profile is its comparative cheapness. The light weight of the product and wide color variations can also be considered advantages of the product. Thanks to this material, the rings on which the curtains are attached move silently. Plastic does not corrode and retains its texture and original shade well. But such a holder will not last long, especially if you load it with massive curtains. Over time, the structure will bend and require replacement.
A metal crossbar is more expensive than a plastic one, but its price is compensated by the reliability and durability of the product. At the same time, metal holders are not very heavy, since they are made from a hollow tube. The movement of the fastening rings on this material creates unwanted noise. A rod made of aluminum or stainless steel is not afraid of high humidity, it is not afraid of rust and plaque. Aluminum products are not very expensive, but many people do not like their matte surface. In addition, under heavy loads or strong mechanical pressure such structures can sag.
The most unmistakable solution when choosing a curtain holder in the bathroom remains a design made of polished stainless steel. In this case, both the appearance is wonderful and the strength is at its best. The only limitation is the high cost of the material. As for the aesthetic characteristics, the metal can be painted in any shade, including gold or bronze, chrome-plated, or artificially “aged” for classic interiors.
The golden mean in terms of price and quality ratio is steel rods made of metal-plastic. They are stronger than plastic and cheaper than metal pipes.
Return to contents
Product Installation

To install the stick, you need to drill holes using a drill and secure the bracket with screws.
For small bathroom with classic rectangular bathtub ideal solution will become a standard pole of a telescopic design. The advantage of such a system is its ease of installation. Even a teenager can handle this job in a few minutes. With the same ease, the structure can be dismantled without leaving marks on the walls.
To install the telescopic rod, you need to remove one of the plugs from it, put on the curtain rings and return the plug to its place. After this, you need to stretch the stick to a length that is equal to the distance between the walls plus a couple of centimeters, and wedge it into the niche. Then all that remains is to adjust the height and hang the protective curtain.
If it is necessary to rigidly fasten the cornice, you cannot do without dowels and screws. To install the holder yourself with a wall mounting option, you need:
- Place the stick on the bathtub and mark with a pencil where it meets the wall.
- Using a level, mark the same points at a height of 150-170 cm above the bathtub, being careful not to touch the edge of the tile to avoid chipping. They need to be calculated taking into account the fact that the rod should not reach the ceiling by 10 cm, and the curtains hanging on it should fall below the side of the bathroom by 20 cm.
- Make sure that marks do not come into contact with electrical, plumbing or other communications.
- Drill holes using a drill.
- Insert dowels into the holes if the walls are tiled, or “butterflies” if the walls are faced with plasterboard.
- Place the bracket and secure it with screws.
- Insert the stick into the fastener.
In order to increase the reliability and safety of curly curtain holders in the bathroom, it is recommended to install supports or additional fastening to the ceiling.
To prevent water from splashing while taking a shower, curtain rods with curtains are installed in the bathroom. They differ in design, method of fixation, and type of material. Additionally, such rods also play a decorative role, acting as an addition to the interior being furnished.
Product Features
A curtain rod is a straight, geometric or asymmetrical tube that is attached to the surface in the bathroom. It is intended for installing curtains that cover the shower area during hygiene procedures. The design features of the product can be seen in the photo of the bathroom curtain rod.

According to the type of installation, the rods are divided into two main groups:


Ceiling-type installation - requires the need to secure brackets to the ceiling. They attach well to concrete bases, as well as plastic panels or slatted structures, but they are not suitable for suspended ceilings or plasterboard.
In addition, the advisability of high installation of curtains is minimal, and it is strictly possible to find suitable designs under corner baths it will be hard.

Wall or combined mounting. The pipe is fixed strictly on the wall or partially on the ceiling in corner blocks. Installation is quite simple, and the design itself is reliable.

Types of cornices
Depending on the type of fastening element and installation method, there are several types of bathroom rods. Their use depends on the characteristics of the bowl, the layout of the room and its interior.

Straight
This type of cornice is considered the most common and popular due to its ease of installation and high reliability. To fix it, install brackets on opposite walls. Most often used in combination with rectangular or oval bowls.


Telescopic
This type is a combination of pipes of different diameters nested inside each other. They extend to the required length and are fixed on the walls without drilling holes for brackets. The permissible sliding length can vary between 1.3-2 m.

The telescopic cornice is first adjusted to size and then wedged between the walls using a threaded flange. Rigidity of fixation is ensured by unscrewing the flange.

A variety of this type is considered to be an expander-type barbell. Its two parts are fastened with a strong spring. After extending to the required length with a margin of 10-15 mm, the structure expands. Telescopic tubes use soft pads to prevent damage to the tiles.

Angular
The design is designed for corner shapes of bathtubs or, if desired, to close the shower area on several sides. Several options are possible here depending on the number of corners in the model.

For example, an L-shaped curtain rod for a bathroom is a stainless steel pipe bent at a right angle. Its diameter varies between 20-25 mm, and the wall thickness should be at least 10 mm.

This is a fairly durable structure, which has an additional attachment to the ceiling for reliable corner connection. Although there are also models with wall mounting only.

A U-shaped corner cornice is suitable for oval or round appliances that are placed near one of the walls. Has two wall and two ceiling fasteners. Most often made to order.


Arc
Radius products are more adapted to oval bowls, asymmetrical bathtubs and devices with curves. Steel or aluminum is used for manufacturing.

They are bolted to walls, but installation on special vertical supports is possible. In the latter case, the structure may bend.


Semicircular
It is mainly used for decorating oval and triangular bowls. The semicircular cornice is additionally equipped with another rod, which is often used for drying not too heavy laundry. The material chosen is steel or aluminum.

Specific types
The advantage of a flexible curtain rod is the ability to adapt to any bath design. The rod is made of ductile aluminum. This profile can be bent to any shape. At the same time, the rigidity of the product is not lost.

The fan design can be unfolded and quickly assembled, saving space and decorating the room. String models that are attached to the ceiling with brackets are also functional. The metal string allows you to securely hang curtains made of different materials.


Variety of materials
To make rods for bathroom curtains, we use various materials, differing in operational characteristics:

Plastic is a budget option, characterized by its light weight structure, ease of installation, and variety color palette. However, the durability of the product is low; plastic curtain rods are prone to sagging and yellowing.


Aluminum is characterized by moisture resistance and low weight. However, in terms of strength it is significantly inferior to steel. Due to the softness of the material, such rods may become deformed.

Thin-walled steel is durable and reliable. However, for use in wet areas A protective paint coating is applied to the product, which wears off over time. Therefore, regular design changes are required.

Polished stainless steel is durable and durable material. Cornices made of such steel are quite expensive. Resistant to moisture and stress.

Wood - this material plays a more important role decorative decoration. Wooden crafts soaked by special means to minimize exposure to moisture. However, even in this case their practicality is questionable.

Installation features
If you want to learn how to install a cornice with your own hands, you can use our simple tips. The easiest way to install a straight rod will be. First you need to align the tube in horizontal plane and make markings on the walls. After this, holes are drilled. The product or bracket is attached to them.


For a corner model, you need to clarify the distance along the long and short parts of the structure. After this, make the markings, having previously cut the tube to the required length. After attaching the brackets, the rod can be put in place.

But in order to secure the flexible modification, you first need to bend it along the contour of the bowl. After this, holes are made in the walls and the rod is attached to them. For a telescopic curtain rod, you will need to extend the tubes to the desired length, align them horizontally and in height, and then secure them with a spring or spacer.

Whatever the quality of a non-metallic cornice, the risk of sagging remains. For fastening strength, you need to choose self-tapping screws and pay special attention to the strength of the corner joints. Taking our advice into account will allow you to choose the right model correctly and quickly install it.

Photo of curtain rods for the bathroom


The end of a bathroom renovation project is crowned by the placement of all the accessories necessary for this - mirrors, shelves, furniture cabinets and shelves and curtains for the bathroom. And if for the main elements there is no big and fundamental difference in what and how to install, then with a bath curtain problems arise - which fastening system to choose, which installation option is better, what features and specifics of fastening the rod are applicable to the room.
It is quite possible to solve these problems without additional effort and consultation, because among the available options and types of accessories for installing curtains there are not only familiar models, but also options that can satisfy the most demanding needs.
Main purpose and design features
To install a curtain rod in a bathtub, first of all, you should know that this design is designed to hold a light curtain that protects the bathroom space from splashing water. This is its main and only purpose, because in order, for example, to hold the weight of wet things when washing or to use it as a handrail, the bar is not intended, it simply cannot withstand such a mass, which is why the design and material from which the bar is made is designed only for this function.
Modern bar designs used in decoration are divided into several types and classes, while maintaining high functionality. The main method of attaching curtain rods to the bathroom today is wall mounting; this is the main type of installation. At the same time, there are other types of fastenings, for example, ceiling or combined fastening at several points, but these are rather exceptions to the rules, used for individual, exclusive cases.
Materials used for manufacturing
For such a relatively simple element that does not require outstanding strength characteristics, the element can be constructed from traditional decorative materials:
- Plastics;
- Metal;
- Metal with polymer coating;
- Metal with anodized coating.
Each of the presented construction materials has its own positive and negative sides, significantly influencing the choice and use of rods in the bathroom. The method of fastening the structure also depends on the material of manufacture, because for some materials the use of a spacer in the form of an internal fastening unit is simply impossible.

Using plastic as a material for a curtain rod in a bathroom allows you to get rid of such unpleasant aspects as rust, metal corrosion, darkening of the surface and peeling paint coating. Such rods are durable and convenient for non-standard solutions, for example, when arranging curved rods for curtains.
The use of straight-shaped plastic rods with plastic fixing elements, without metal structures, significantly reduces the cost of installation and operation, because the absence of metal guarantees the absence of corrosion in the connecting elements. The negative side of plastic is its relative fragility, especially in models made by unknown manufacturers, the need to periodically tighten connections and monitor fixation points.

Metal rods for bathroom curtains are used most often today; the rigid design of the fastening elements and the metal itself allows such an element to be used more often. The metal rod allows you to provide several options for attachment points and fixation points. Metal rods are durable and do not require special care, most of them have either a polymer coating, in the form of a layer of plastic, or paint and varnish in the form of a layer of alkyd enamel. At the same time, metal in such a specific room as a bathroom, with high humidity without working ventilation it is susceptible to corrosion, which must be taken into account when choosing a model.
Polymer-coated metal rods for bathroom curtains fit perfectly into any interior, because a huge range of plastic colors and patterns very easily solves the problem of matching all design components. The plastic coating of metal rods reliably protects the metal from moisture and gives the structure additional rigidity. Plastic makes it easier to maintain and extends the life of this barbell.
Curtain rods made from light alloys, for example, aluminum, can have a decorative metallized coating. Metal structures in the form of a profile are most often used in decoration complex profiles– curved, angular, round and oval. The advantage of this version of the model is its simplicity and elegance, which can emphasize the individuality of the room design project.
Shapes of rods for curtains

The main criterion for choosing the profile shape of the rod is the shape of the bathtub bowl itself, Straight, standard size a bathroom installed against a wall is most often complemented by a straight telescopic or solid rod, attached to the ends in opposite walls.
The semicircular shape of the bar corresponds to the angular position of the bathtub, both straight and semicircular or oval, installed against the wall. Semicircular or with a certain bend of the arc, the design can be round, rectangular, or profile. The tubular section of a small-sized curtain rod has a fastening unit with a bolted or anchor connection to the wall. For rods longer than 2.0 meters, it is recommended to have an additional support point with a fastening unit.

For baths with angular location An angle rod of both solid and composite construction is provided. Small baths or shower trays have two mounting points on the walls, but for impressive volumes it is recommended to choose the option with the additional installation of a rack or ceiling rod.

Exclusive round, oval or rectangular rods, installed above bathtubs that are centrally located in the room, have a durable ceiling or floor mount; such rods are made only of metal or light alloy, and the mounting option depends on the author’s decision of the project.

One-piece types of structures made from a monolithic section of profile are convenient due to ease of installation and use, while composite ones require attention and accuracy during assembly. At the same time, monolithic rods made of light alloy profiles can take on different shapes due to their correct bending. It is not recommended to carry out such an operation on your own without sufficient experience and equipment, since correct shaping in two planes, without outside help and experience, does not always work out beautifully. It is easiest to achieve the required arc with a metal or aluminum profile round or oval cross-section.
Curtain rod mounts

The installation of the selected variant of the rod has a number of features, both in terms of the technological work carried out and in terms of the layout of the fastening units themselves.
The simplest in terms of installation and the easiest to use available tools is telescopic rod. This is the most common type of rods that have locking plates in the middle. Installation is carried out by installing plastic plugs at the ends of the rod and securing the rod itself by simultaneously applying maximum force to the opposite walls. When installing such a structure, you need to pay attention to how the curtain will be suspended; if solid rings are used for this, then they must be put on the rod before installation.

Telescopic rods
Plastic fasteners-plugs used in the rod for curtains of this type can be pre-installed using silicone sealant or self-tapping. The use of metal fasteners will require marking and using a hammer drill to make a hole in the wall.
Individual rods can be installed using the spacer method and using a screw element. A screw thread assembly is pre-installed inside the rod. Movable screws are installed in plastic spacers on the walls and using wrench are twisted until the rod is given the required rigidity. Later the screws close decorative overlays. A special feature of this spacer installation method is the need to monitor the tension so that excessive tension does not lead to deformation of the rod profile, especially those made of plastic.
Rod installed using anchor bolts In addition to mounting points on the walls, it may have additional installation locations for support rods. For wall mounting, and these are mainly straight rods and arc ones, they are installed on special fastening units on the walls. The location of the wall fastening element is preliminarily marked on the wall, then a hole is made for an anchor bolt or plastic dowel. At the final stage, the rod itself is installed in the fastening element and clamped with screws.

Rod with anchor bolts
Additional support points in arc, corner or hanging rod models are usually attached to the ceiling, although it is possible to install them to a support placed on the floor. Such an additional element is connected to the rod by means of an additional clamp that tightly encircles the rod. For bathrooms with a plasterboard ceiling structure, it is important to correctly calculate the installation locations metal profiles even before the installation of the ceiling support element, and secure the installation of electrical wiring by preventing conductors from coming into contact with metal parts rods.

For structures intended to be installed above a free-standing bathroom, the ceiling mounting option can be implemented either in the form of a rigidly fixed model or suspended on flexible elements - for example, on decorative chains or rods.
How to install a curtain rod
For quality installation For the chosen model of curtain rod for the bathroom, it is recommended that you first carefully study the instructions, spending a few minutes on this. Next, having decided on the order and sequence of work, select necessary tools and start marking the mounting points.
The installation height depends on the length of the curtain models. The standard location is considered to be the height at which the bottom of the curtains extends 15-20 cm below the level of the top of the bathroom. All wall mounting points must be aligned horizontally and in the same horizontal plane.

When using an anchor installation method, it is recommended to use it to make a hole in the wall. hammer drill And electric drill, it is important to know that the hammer drill is used to work with concrete or brick wall, and here is an electric drill equipped with a diamond drill for work on ceramic tiles needed to make a hole in the tile.
It is recommended to cover the bathtub bowl with film or cloth while the work is being carried out, this will protect the enamel from chipping and prevent dust from penetrating into the drain siphon. It is recommended to fill the hole made with a small amount of plumbing silicone before placing a plastic dowel or anchor bolt there. Silicone will also be needed when installing the wall mounting unit, filling the space between metal structure and the wall, such a gasket will prevent moisture from seeping deep into the wall and becoming a favorable place for fungus and mold.
Bolts are tightened without special effort In order not to damage the part, many manufacturers complete metal rods with plastic or light alloy elements.
At the final stage, rings are put on the rod, and the rod itself is fixed with screws on the fastening points.

Curtain rod for the bathroom: shapes, fastenings, installation
Despite the popularity of glass and plastic bathroom curtains, the demand for them is only growing. This is explained not only at an affordable price and ease of use - correctly selected curtains play important role in interior design. But even the most beautiful canvas needs to be hung skillfully, otherwise it’s unlikely to achieve the desired effect. And here the cornice or rod for the curtain in the bathroom comes to the fore - it seems simple and discreet, but such an important accessory.
For the curtain to look harmonious, the cornice must follow the shape of the bathtub. And bathtubs are now quite diverse: in any plumbing salon there are rectangular, round, oval shape, as well as angular and asymmetrical. That is why the range of rods is also quite impressive, and making a choice is not at all easy.
Types of rods by shape
- . These are standard models that are mounted horizontally between two opposite walls. They have the simplest design and differ from each other only in length and diameter.
- . These include semicircular, arched or L-shaped models. Designed for corner baths, they make it possible to completely close the space on both sides.
- . Most decorative models, intended for separately standing bathtubs or a completely open shower. Eat combined options, on which the overhead shower and curtain are simultaneously attached. They look very stylish, unusual, and easy to use.
- Special rods. These products are intended for designer baths Asymmetrical in shape, they are made mainly to order and are exclusive models.
By material
- . Plastic products are the most inexpensive and lightweight, and have the greatest variety of colors. Curtain holders move along such curtain rods almost silently. In this case, curtains must be hung only from lightweight materials, otherwise the rod will begin to sag. Over time, the color of the coating becomes faded, microcracks and ring marks appear on the surface of the rod.
- . More durable and durable, at a price slightly more expensive than plastic ones. They have an attractive appearance, are resistant to temperature changes, washing, corrosion and mold, but under the influence of loads they can become deformed. In addition, hollow aluminum rods amplify sounds, and therefore it will not be possible to quietly close or open the curtain.
- . The most durable option. Such rods are not subject to deformation even under increased loads; they retain the smoothness and shine of the surface for years. They are not afraid of corrosion, fungi, and are easy to clean from plaque. Steel rods are more expensive than others, but they are well worth their price.
- Combined. This type of cornices is made of metal and covered with a special plastic that is resistant to various types of influences. Such rods do not bend under loads, do not lose their aesthetic qualities for a long time, and do not make noise when the rings move.
By mounting method
Telescopic method. Only suitable for straight rods not large sizes. The telescopic design allows you to select the desired length of the cornice and secure it using a spacer or spring mechanism between opposite walls.
- Pros: for installation you do not need to take precise measurements and drill the walls; installation takes a couple of minutes. If necessary, the bar can be easily moved higher or lower.
- Disadvantages: this type of fastening is not the most reliable - pull the curtain hard enough and the rod may fall. For this reason, it is not recommended for families with small children.
Fastening with dowels. This reliable way, and it is suitable for rods of any size and configuration. Most often, rods are attached to the walls, sometimes only to the ceiling, and products of large sizes and complex shapes are simultaneously fixed to both the walls and the ceiling.
- Pros: a screwed rod will never fall; the choice of cornice is not limited to a certain shape and dimensions.
- Cons: installation requires tools and skills to work with them, as well as accurate measurements. If you later need to re-hang the bar, you will have to seal the holes from the fasteners in the walls and ceiling.
Design features
Each type of rod has its own design features that affect the type of installation. Straight rods are divided into three types:
- telescopic– are a two-tube design various diameters and a turning mechanism. The smaller tube is located inside the larger one, and during installation it extends to the required length, and the mechanism ensures reliable fixation in this position;
Telescopic rod for bath curtains 80-140 cm
- expander cornice– a version of a telescopic rod, only instead of a rotating mechanism, springs located at the ends of the product are used;
- fixed length rods– are a tube with flanges and decorative caps at the ends. Fastening is done using flanges on dowels, and caps cover the fastening elements, increasing the aesthetic appeal of the structure.
All curved models are divided into rigid and flexible. Rigid ones consist of hollow metal and plastic tubes different sections. The shape is given to them at the stage of manufacturing the rod, and the only thing that can be adjusted during installation is the length. When adjusting the cornice to the size of the bathtub, the excess is simply cut off.
For the manufacture of flexible rods, a special aluminum profile or aluminum tape is used. There are also plastic options, but they are not very suitable for the bathroom. Such products are easy to give the required form, so they are ideal for non-standard asymmetrical bathtubs. Of course, their cost is much higher than tubular models, but the demand for them is quite high.
Concerning corner models, then they can be solid or prefabricated. Small rods are made from a whole piece of tube or profile. They are reliable, durable, and do not require additional fastenings. Prefabricated structures consist of several parts that are tightly connected to each other. This makes it possible to easily reduce the length of the rod if necessary, but requires the presence of ceiling hangers. Without them, the product will sag under load, and most of all - at the joints.
Manufacturers of curtain rods
On domestic market rods for curtains in the bathroom are presented a large number manufacturers, because this accessory is quite in demand. Not the last place is occupied by Russian brands, whose products meet the highest requirements, although they are not very diverse. To make your choice, it is worth studying in more detail the range and main characteristics of popular models.
| Manufacturer | Brief characteristics | approximate cost |
|---|---|---|
| 1MarKa (Russia) | Barbells are semicircular, arched and angular, made in a modern style. The average length of the product is 150-170 cm, the rod diameter is 25 mm, the wall thickness is 1 mm. Made of stainless steel, chrome plated. Mounting method: screws. The manufacturer provides 1 year warranty on all models | 2500-3600 rub. |
| Aquanet (Russia) | Straight and arched rods in modern and high-tech style. The length of the products is 150-170 cm, the rod diameter is 25 mm. Made of stainless steel with chrome plated, fastened with screws. Warranty period – 1 year | 1500-3770 rub. |
| Bacchetta (Italy) | straight telescopic rods, angular and compound arched models. The length of corner products is from 140 to 170 cm, telescopic 125-220 cm, rod diameter 25 mm. The material of manufacture is predominantly aluminum, the coating is chrome and white enamel in glossy and matte versions. Fastening methods: screws, spaced | 760-1840 rub. |
| Carnation Home Fashions (USA) | Straight telescopic rods in modern and retro style. Adjustable to lengths from 104 to 190 cm. Made of stainless steel. The coating has several color options and can be matte or glossy. In expensive models it is additionally used fake diamond, a pattern is applied to the coating, and there are decorative attachments at the ends of the cornice. The rods are attached with screws and spacers | 2200-4700 rub. |
| Grekon (Greece) | Straight and angular models. Telescopic rods are adjustable to a length of 75-125 cm, the length of the corner rods is 160-180 cm. All products are made in a modern style, coated in chrome or white enamel. The surface can be matte or glossy. The rods are made of aluminum and are fastened, depending on the type, with screws or in a spacer | 2900-4300 rub. |
| Ridder (Germany) | The model range is very wide: there are telescopic, angular, U-shaped, and semicircular rods. Products with complex shapes are additionally equipped ceiling mounts. The length varies between 90-245 cm, the material of manufacture is aluminum. Coating options: chrome, white enamel. Mounted with screws and spring clips. The manufacturer provides a 3-year warranty | 1600-2980 rub. |
| Triton (Russia) | Angled and arched rods in a modern style. The length of the products is 140-180 cm, the material of manufacture is stainless steel. Fastening is done with screws. The manufacturer's warranty period is 1 year | 2660-3260 rub. |
| Radomir (Russia) | Arched and angular models. The length varies from 140 to 270 cm, fastening is with screws. All rods are made of stainless steel, chrome-plated, and have a 1-year manufacturer's warranty. | 2630-3280 rub. |
| Riho (Czech Republic) | Very reliable, comfortable elite class rods. All models have an impeccable design, a smooth arched shape, and are made of stainless steel. The coating has several options - silver, gold, chrome. The rods can withstand loads from 3 to 10 kg, the diameter of the product is 16-25 mm, the wall thickness is 1-1.5 mm. The manufacturer provides a 5-year warranty | From 3500 rub. |
bathroom curtain rod
Boom installation technology
Installing a rod is a fairly simple process, but it also has certain subtleties. Below are options for installing cornices in spacers and on flanges, with ceiling hangers. The nuances of fastening to concrete walls, tiles, drywall and plastic sheathing will also be considered.
Installation of a straight rod in a spacer
To work you will need a tape measure, a level, a pencil and the bar itself.
Step 1. Based on the length of the curtain, select optimal height for the rod. The bottom edge of the curtain should freely fall into the bathtub by at least 20 cm to avoid splashing water, and there should be a distance of at least 15 cm between the rod and the ceiling. Measure with a tape measure the desired height and mark the point with a pencil. Place a mark on the opposite wall in the same way.
Step 2. Unpack the rod and be sure to read the manufacturer's instructions to avoid installation errors. Check how the mechanism works.
Step 3. Extend the tube to the required length, add another 1 cm, string the curtain rings if they are not removable.
Step 4. Lift the barbell and carefully place it in place, bringing one end in first and then the other. Place a level on top and make sure the cornice is positioned exactly horizontally. If it is not, correct it by applying pressure at the base. Then press lightly with your hand in the center - a properly secured rod should not move a millimeter. After that, all that remains is to hang the curtain.
Mounting the rod on flanges to a concrete surface
To work you will need:
- drill;
- screwdriver;
- tape measure and pencil;
- level;
- rod and dowels with self-tapping screws, which are included in the kit.
Step 1. Unpack the rod, check the presence and integrity of all elements. Pick up comfortable height fastenings taking into account a gap of 10-15 cm wide between the ceiling and the rod. Now attach the rod at the desired height to the wall surface and determine the attachment points. The structure should be positioned so that the curtains can completely cover the bathtub, but do not interfere water procedures. Mark the fastening points with a pencil.
Important! Before starting work, you should make sure that there are no electrical wiring, water pipes or other communications in the areas where you intend to drill. You can check this using special device– a household hidden wiring detector.
Step 2. Using a level, check the position of the marks relative to the horizontal, and correct them if necessary. If the distance between the marks is large, it is most convenient to use a water level.
Step 3. Next, take the first flange and attach it to the wall so that the mark is exactly in the center. Use a pencil to mark drilling points through the holes on the flange. Do the same on the other side.
Step 4. Now, using a drill with a hammer drill mode and a concrete drill, make holes the size of the dowels at the marked points. The diameter of the drill must match the diameter of the dowel. Typically, the rod comes with self-tapping screws and dowels measuring 6 mm. The depth of the hole should exceed the length of the fastener by approximately 5 mm. Typically, standard round flanges have three holes.
Step 5. The holes need to be cleaned of dust, dowels inserted there, and hammered in tightly. Next, attach the flange again and screw it with self-tapping screws. The flange is secured on the other side in the same way.
Step 6. D Next you need to take the bar, put silicone liners on both ends, and pull decorative caps on them so that they are each turned in their own direction. If the rings for the curtain are non-removable, they need to be strung before attaching the second cap.
Step 7 Now loosen the clamping screws on the protruding part of the flanges, insert the ends of the rod one by one. Tighten the clamping screws until they stop on each side, and push the decorative caps close to the wall surface.
Rods are mounted on brackets in a similar way - first the brackets are attached to the wall, then the ends of the rod are inserted into them. The main condition is to accurately take measurements, because correcting errors will not be easy.
The main difference here is the presence of a ceiling suspension, otherwise the procedure for attaching the rod is almost the same as for the previous option. Hangers, mounting rings, and additional screws and dowels are usually included with the rod.
Step 1. The rod is assembled by inserting straight tubes into the corner elements. Try the product on the wall; if the rod is too long, cut off the ends.
Step 2. Put both brackets on and lightly fix them on the rod with screws. Place it on the wall at the required height, check the horizontal level, and mark drilling points through the holes in the brackets.
Step 3. Remove the brackets from the cornice and put everything aside for now. Next, holes are drilled with a diameter of 6 mm and a depth of 40-45 mm, dowels are inserted and hammered in with a hammer.
Step 4. The brackets are individually screwed to the walls with self-tapping screws, a fastening ring for the ceiling suspension is put on the rod, the ends of the rod are inserted into the brackets and secured with screws.
Tighten the screws. Scheme
Step 5. A fastening attachment with holes for self-tapping screws is screwed onto a thin metal tube with a thread that acts as a suspension. Apply it to the rod so that the nozzle rests on the ceiling, and the tube itself adjoins the rod at a right angle in the bending area. It is the corner area that most needs additional support. Mark the cutting point on the tube with a pencil and saw off the excess.
Step 6. The free end of the tube is inserted into the fastening ring on the rod, clamped with a screw, after which the suspension is lifted vertically and pressed against the ceiling. Drilling points are marked through the holes of the nozzle, then holes are made, dowels are driven in, and the suspension is screwed to the ceiling.
If the rod is too long or has a more complex shape, you will need not one, but 2-3 hangers, located at an equal distance from each other. This method is suitable not only for concrete ceilings, but also for plasterboard surfaces, as well as those covered with plastic. The features of such installation will be discussed below. The only exception is suspended ceilings, in which case other fastening options must be used.
A U-shaped rod is also mounted according to the angular type. The only difference is that both ends are fixed on one wall. Usually models small sizes have only wall mount, which can easily withstand a load of 4-6 kg. But keep in mind that this requires a very strong, reliable base - you cannot hang the bar only on drywall or plastic panels.
Installation of flexible profile
Installing an aluminum flexible curtain rod is also not particularly difficult. To give the product the required shape, you must first draw a template. Suitable for this big piece thick cardboard. Place its edge against the side of the bathtub and trace the outline, making small allowances along the edges - 2-3 cm.
Step 1. Take the profile in your hands, press in the middle with your knee and bend it little by little. The material bends quite easily, so try not to press too hard. As you work, constantly try on the profile against the template so that you don’t have to straighten excessively bent corners later.
Step 2. The finished profile must be attached to the wall and the mounting locations must be determined. If the profile consists of several parts, they are fastened together using special plates that come with the cornice.
Step 3. Attach the brackets according to the marks and mark points on the wall through the holes with a pencil. Drill, insert dowels, screw the brackets to the wall.
Step 4. Now take the hangers, put the fastening attachments on them and attach them to the fixed brackets so that the attachments rest tightly against the ceiling, and the lower ends are located at the level of the profile fastening. Since the tubes are quite long, you will have to cut them, and to do this, mark the cut line with a pencil.
Advice. To increase the security of the attachment, drill a hole in the tube for the clamping screw located at the bottom of the nozzle. When tightened, the screw will enter the tube, and it will not be able to slip out even with increased load on the cornice.
Step 5. Insert curtain hooks into the profile, lift the structure and insert its ends into the brackets. Secure them with self-tapping screws on the bottom side.
Step 6. Insert the hangers into the holes on the connecting plates, screw them lightly and mark the mounting points on the ceiling. Drill, secure the dowels, and then insert a long screw into the hole of the nozzle and use a screwdriver to fix it to the ceiling. Now you need to insert the tube all the way and tighten the screw. Secure the remaining hangers in the same way.
Step 7 The free end of the hanger must fit into the hole on the connecting plate. To do this, the profiles are moved apart a little, the end of the tube is threaded through the hole, and they are fixed with self-tapping screws on the bottom side of the profile.
After this, all that remains is to move the profiles back so that there are no gaps left, and screw them to the plate with screws through the corresponding holes along the upper edge.
Features of installation on different surfaces
On concrete walls lined with tiles
To secure the rod to the tile, you first need to make sure that the cladding is strong. If the tiles are weak, the seams are crumbling, traces of fungus are visible on the surface, you cannot attach anything to the wall. First you will have to dismantle poorly secured elements, remove any remaining glue, clean out the seams and re-face everything.
How to drill tiles in the bathroom
Everything else is done according to the technology described above.
On drywall under tiles
As a rule, walls and partitions made of plasterboard adjacent to the bathtub are tiled. Paint and waterproof plaster under direct exposure to water cannot provide reliable protection this material, unlike tiles. But this design makes it a little more difficult to attach accessories, since it requires special care.
Instead of standard dowels, butterfly dowels are used.
If the rod is large and heavy, the fasteners in the drywall will not withstand the load and will become loose over time, which means you need to drill deeper - to concrete base. In this case, the fasteners also need a large length, taking into account the thickness of the drywall, tiles and the gap between the gypsum board and the wall. The kit usually includes self-tapping screws measuring 5x40 mm, so you will need to purchase separately self-tapping screws of the same diameter, but 80-100 mm long. The dowels, accordingly, should have a diameter of 6-8 mm and a length of 80-100 mm.
The marking is carried out as standard, as on other surfaces. A drill should be at least 10 cm long and must be sharpened. You need to drill at low speeds (1000 rpm), holding the tool firmly and preventing it from slipping. Having drilled through ceramics and drywall, the drill is changed to a Pobedit one and continues to go deeper into the concrete. After this, the rod is mounted on the dowels.
After tightening the self-tapping screw, you get this kind of stop on the back side
On plastic panels
Installing the rod on walls covered with plastic is quite simple. Plastic is not afraid of vibrations and is easy to drill. Here, too, you need to use long dowels, since you cannot attach the rod to the plastic itself - it simply will not withstand the load from the cornice and curtain, and the fasteners will tear out of the sheathing. So, take a regular drill and make neat holes in the plastic at high speeds. Then the concrete is drilled using a Pobedit drill in hammer drill mode. When fixing the product with self-tapping screws, it is very important not to overtighten them, otherwise the plastic will be deformed and may subsequently crack.
If you plan to install the rod in a spacer, keep in mind that thin plastic will bend and be pressed under such influence. It is best to prepare a stop for the rod at the stage of wall covering: at the location of the rod, fasten two strong boards on the wall to the thickness of the sheathing. Otherwise, to avoid pushing through the plastic, the rod will have to be mounted on dowels.
When choosing a curtain rod for the bathroom, you need to consider first of all the quality and durability of the product. In order not to change the barbell every 3-4 years, pay attention to steel and metal-plastic models. Inspect them carefully before purchasing: there should be no scratches, abrasions, or other defects on the surface, and the parts should fit tightly at the joints, leaving no gaps. Be sure to check the package contents, availability of fasteners and manufacturer’s instructions.
As for design, a lot depends on the interior of the bathroom. All accessories must be in harmony with each other and correspond to the overall design style. If the faucets and cheap stand are metal and made in retro style, then plastic colored rods do not match them in any way. The shape also means a lot: in a spacious, light bathroom, rods with curly curves and ring options look advantageous, while straight models are more suitable for small rooms.
Curtain rings also come in a wide variety of shapes and materials. The most practical are polymer-coated metal rings. Ordinary metal rings rattle, leave abrasions on the rod, and do not glide smoothly. Plastic does not last long and quickly loses its visual appeal. But metal with a polymer coating does not have such disadvantages, so using such rings is very convenient.

Video - Installation of a flexible rod